
Introduction - Brewing your own beer for every budget. For those with plenty of time, and for those in a hurry.
Your own beer, just imagine. Turning water into beer. Some have done it with wine before, but it turns out you can do it with beer too. In this text, I want to provide you with step-by-step practical information to brew your own beer. No complicated theories with intimidating jargon, but hands-on, ready-to-use information for making beer yourself. Throughout this article, you will also find the gear you need to get started. You can spend as much or as little as your budget allows. You can brew beer quickly or spend a bit more time on it. Before I begin the 9 steps to making beer, I will explain 2 ways in which you can make your own beer.
The 9 fundamental steps of brewing beer
I am going to mention the phases now, which will allow me to refer back to them later in this beer brewing guide.
- Choosing the beer style and ingredients
- Crushing the grain
- Mashing or making the mash
- Sparging the grain bed
- Boiling the wort
- Cooling the wort
- Fermenting the wort
- Cold stabilization or cold crashing
- Bottling and conditioning
But before we start with the 9 steps, some further clarification.

Instant coffee or grinding your own beans?
You might have already guessed that this article isn't about coffee. But the 2 ways to make beer can be compared to coffee. It’s about saving time and simplicity. For me, it doesn't detract from the quality. I’ve had super tasty instant coffee, and I’ve also had undrinkable coffee made from freshly ground beans from Guatemala. The 2 methods for making beer that I want to explain are:
- Making beer with a beer brewing kit using beer concentrate or malt extract
- All-grain method: artisan beer making with grains, and possibly sugar, hops, yeast & any additives
Brewing beer with a beer kit: beer concentrate or malt extract to make beer
Brewing beer with beer concentrate or malt extract is a simple and inexpensive way to brew high-quality beer at home. Despite what some homebrewers say, brewing with a beer concentrate or malt extract can produce great beer.
Let’s just say that with a beer kit using extract or concentrate, the first 6 steps of brewing beer become very simple. With such a concentrate or extract, you are already more than halfway through the beer-making process and you have already skipped the most time-consuming steps. It’s up to you whether you brew with a concentrate or an extract.
With beer brewing kits (ingredients), you can also buy a starter kit (the equipment you need) containing everything required to turn your beer kit into beer. A beer brewing kit is ideal to find out if making beer is for you. Once you’ve caught the brewing bug, you can delve deeper and consider using the all-grain method. With the all-grain method for brewing beer, you have even more possibilities and can add your own personal touches. A beer brewing kit with concentrate or extract can be compared to creating art with 12 colored pencils; the all-grain method is more like painting with a palette where you can create countless color combinations yourself.
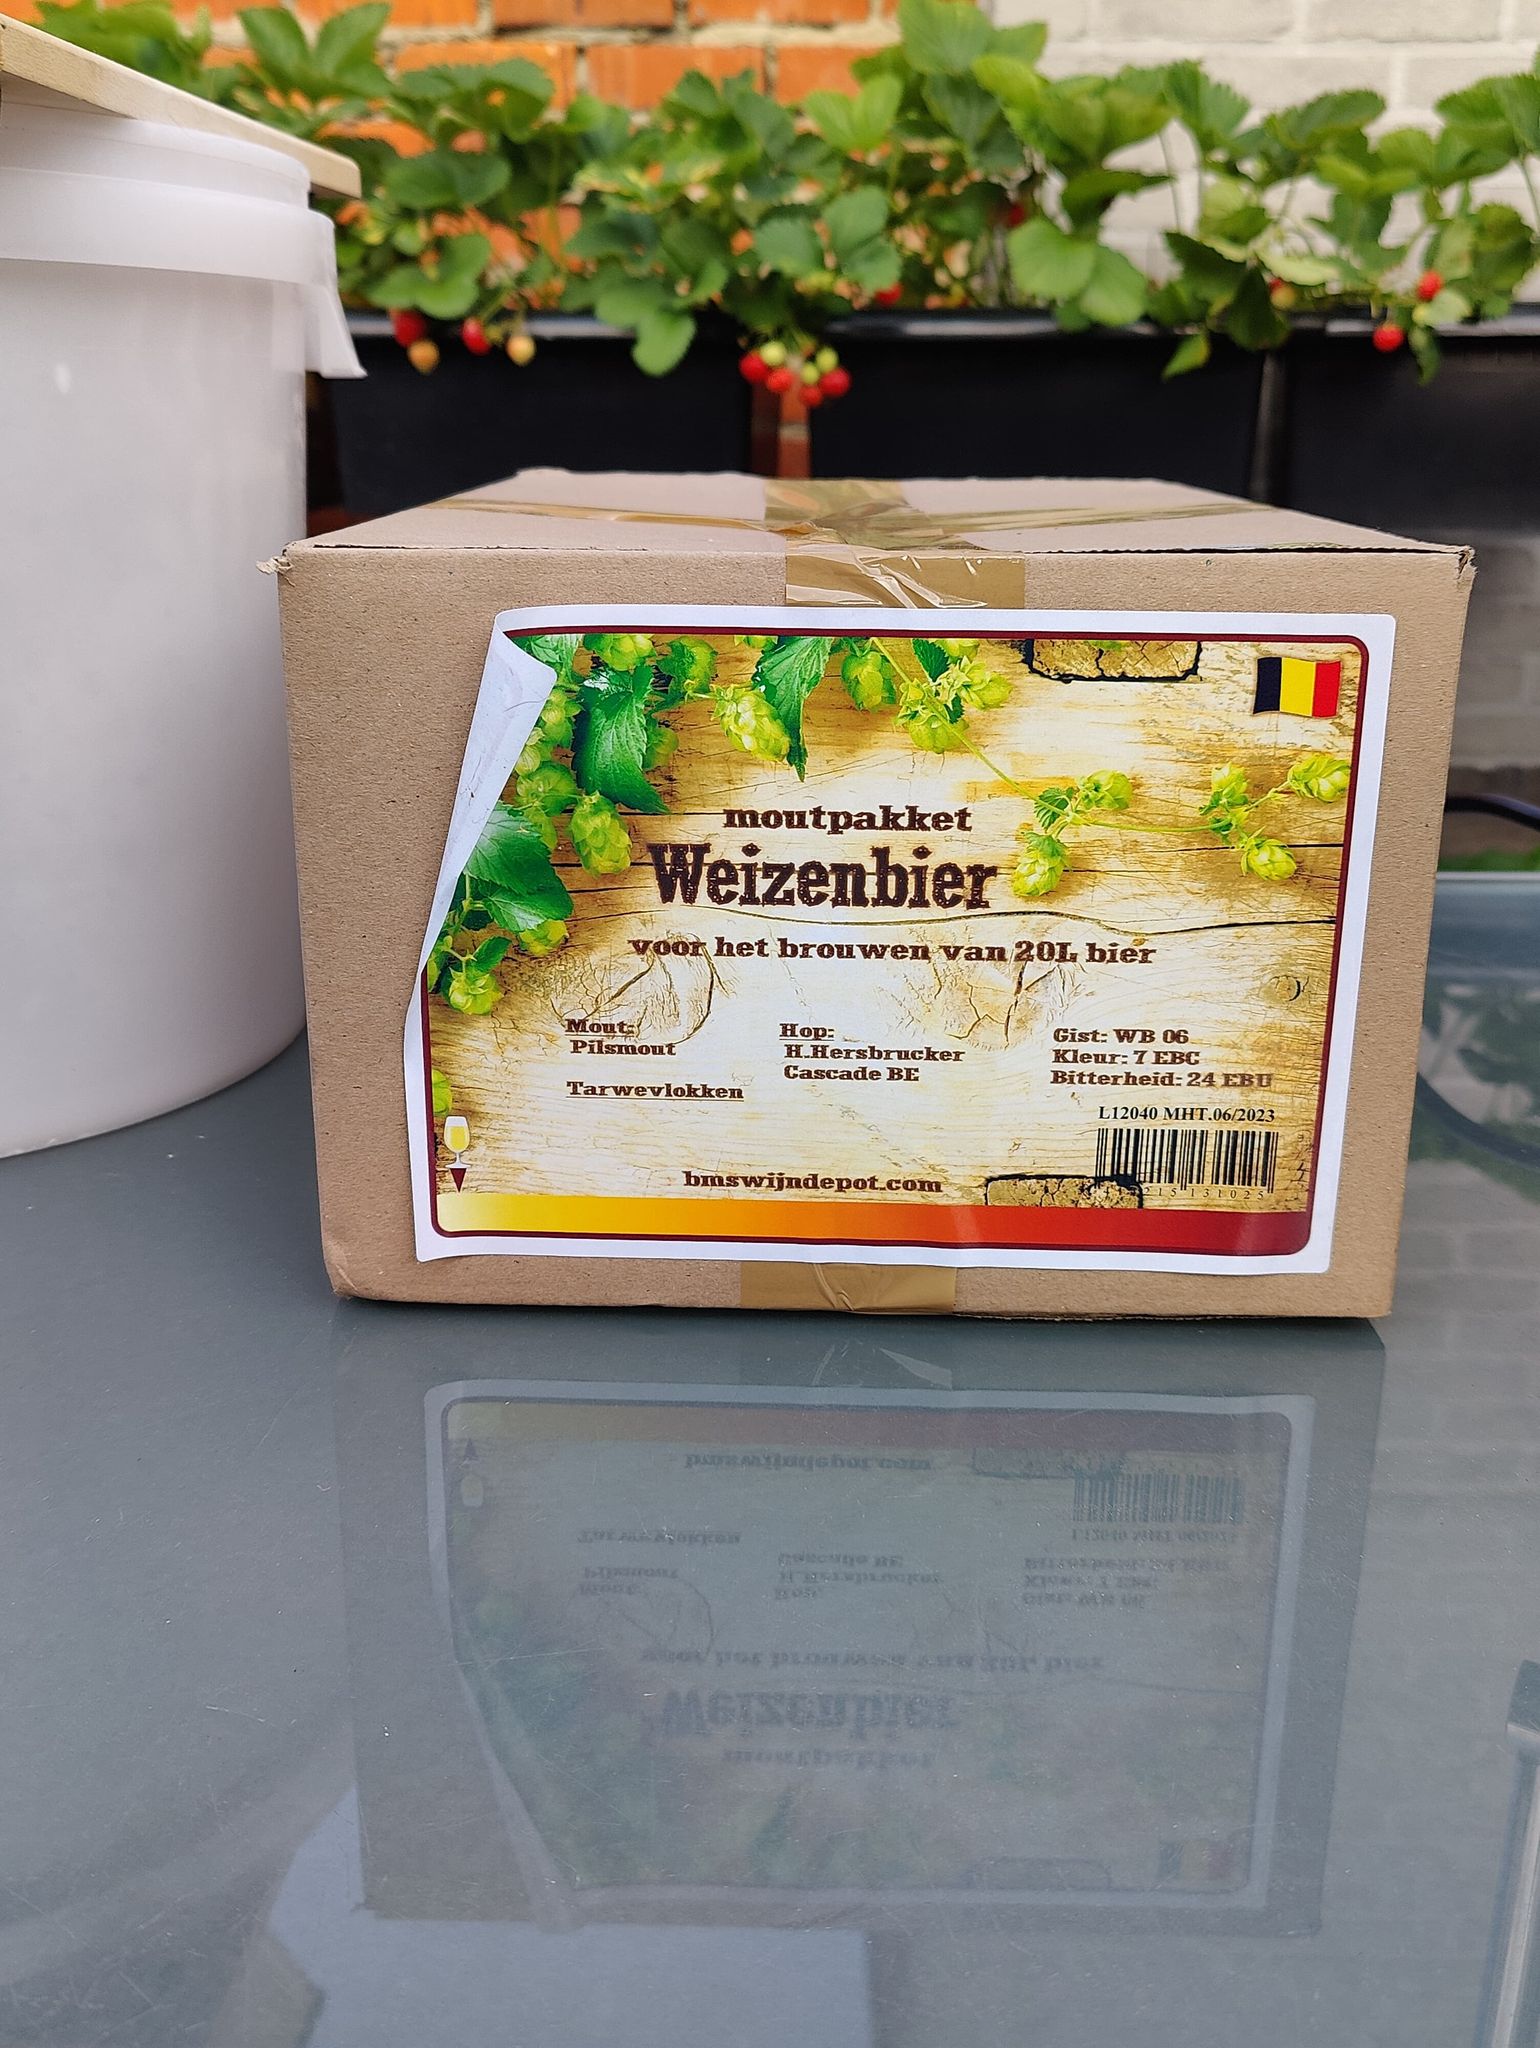
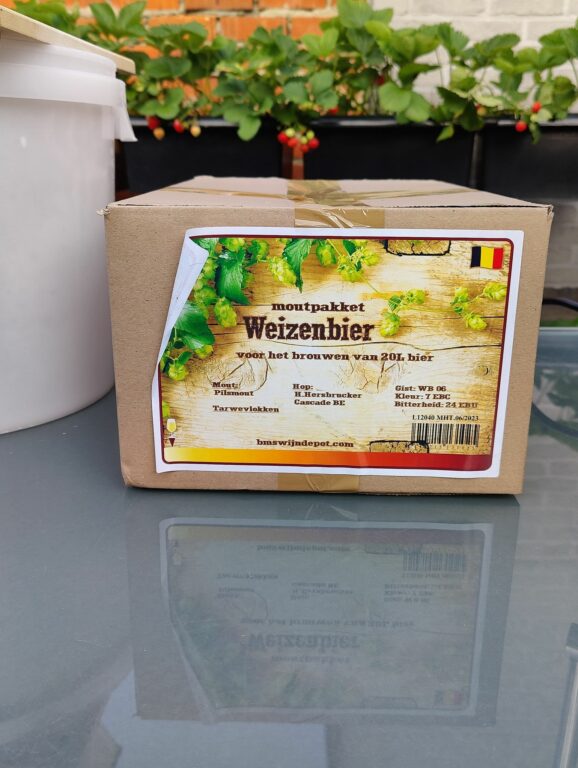
There are also all-grain beer brewing kits or malt kits that contain malt, hops, yeast, and additives to go through all 9 steps. They are interesting if you don't want to make all the choices yourself but still want to brew an original beer.
Brewing beer from grains, and possibly sugar, hops, yeast & any additives (all-grain method)
With just a piece of charcoal, you can make a beautiful drawing. But with multiple colors, painting techniques, different types of canvas, etc., you can be very creative. I get a bit of that feeling with all-grain brewing. Not that it automatically makes your beer better, but you have so many more options. You also have more options to completely mess it up :) With a beer brewing kit using extract or concentrate that I mentioned earlier, you have less chance of errors, although you have to be careful there too.
In this article, I will focus exclusively on all-grain or artisan brewing with water, grain, hops, yeast, and other additives. I won't talk about concentrate or extract brewing because the product description on the packaging usually tells you perfectly how to brew your beer.
Before I explain the 9 steps from water to beer, I’ll provide some introductory information for all-grain beer brewing:

What equipment do you need to brew beer?
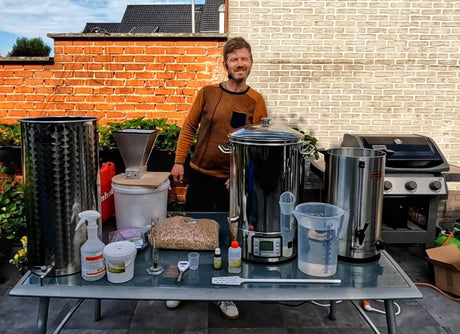
FYI: I brew beer with an automatic brewing kettle with a circulation pump. These are quite affordable these days and very convenient for brewing with grain. For 400-500 euros, you have an automatic brewing kettle that will guide you through all the steps of brewing up to fermentation (step 7) without any problems. A brewing kettle with a grain bag that you have to place on an electric or gas stove with all the "risk of burning" that entails—I’ll pass on that.
If you take the hobby seriously and have the budget to purchase an automatic brewing kettle, definitely don't hesitate. If you want to see if brewing beer is really something for you first, and/or if you want to spend less money, it is best to opt for brewing from a concentrate (see above). With an "extra beer starter kit" with a plastic bucket and all measuring equipment for 75 euros, you can perfectly well make beer. But for all-grain brewing, I would always recommend an automatic brewing kettle.
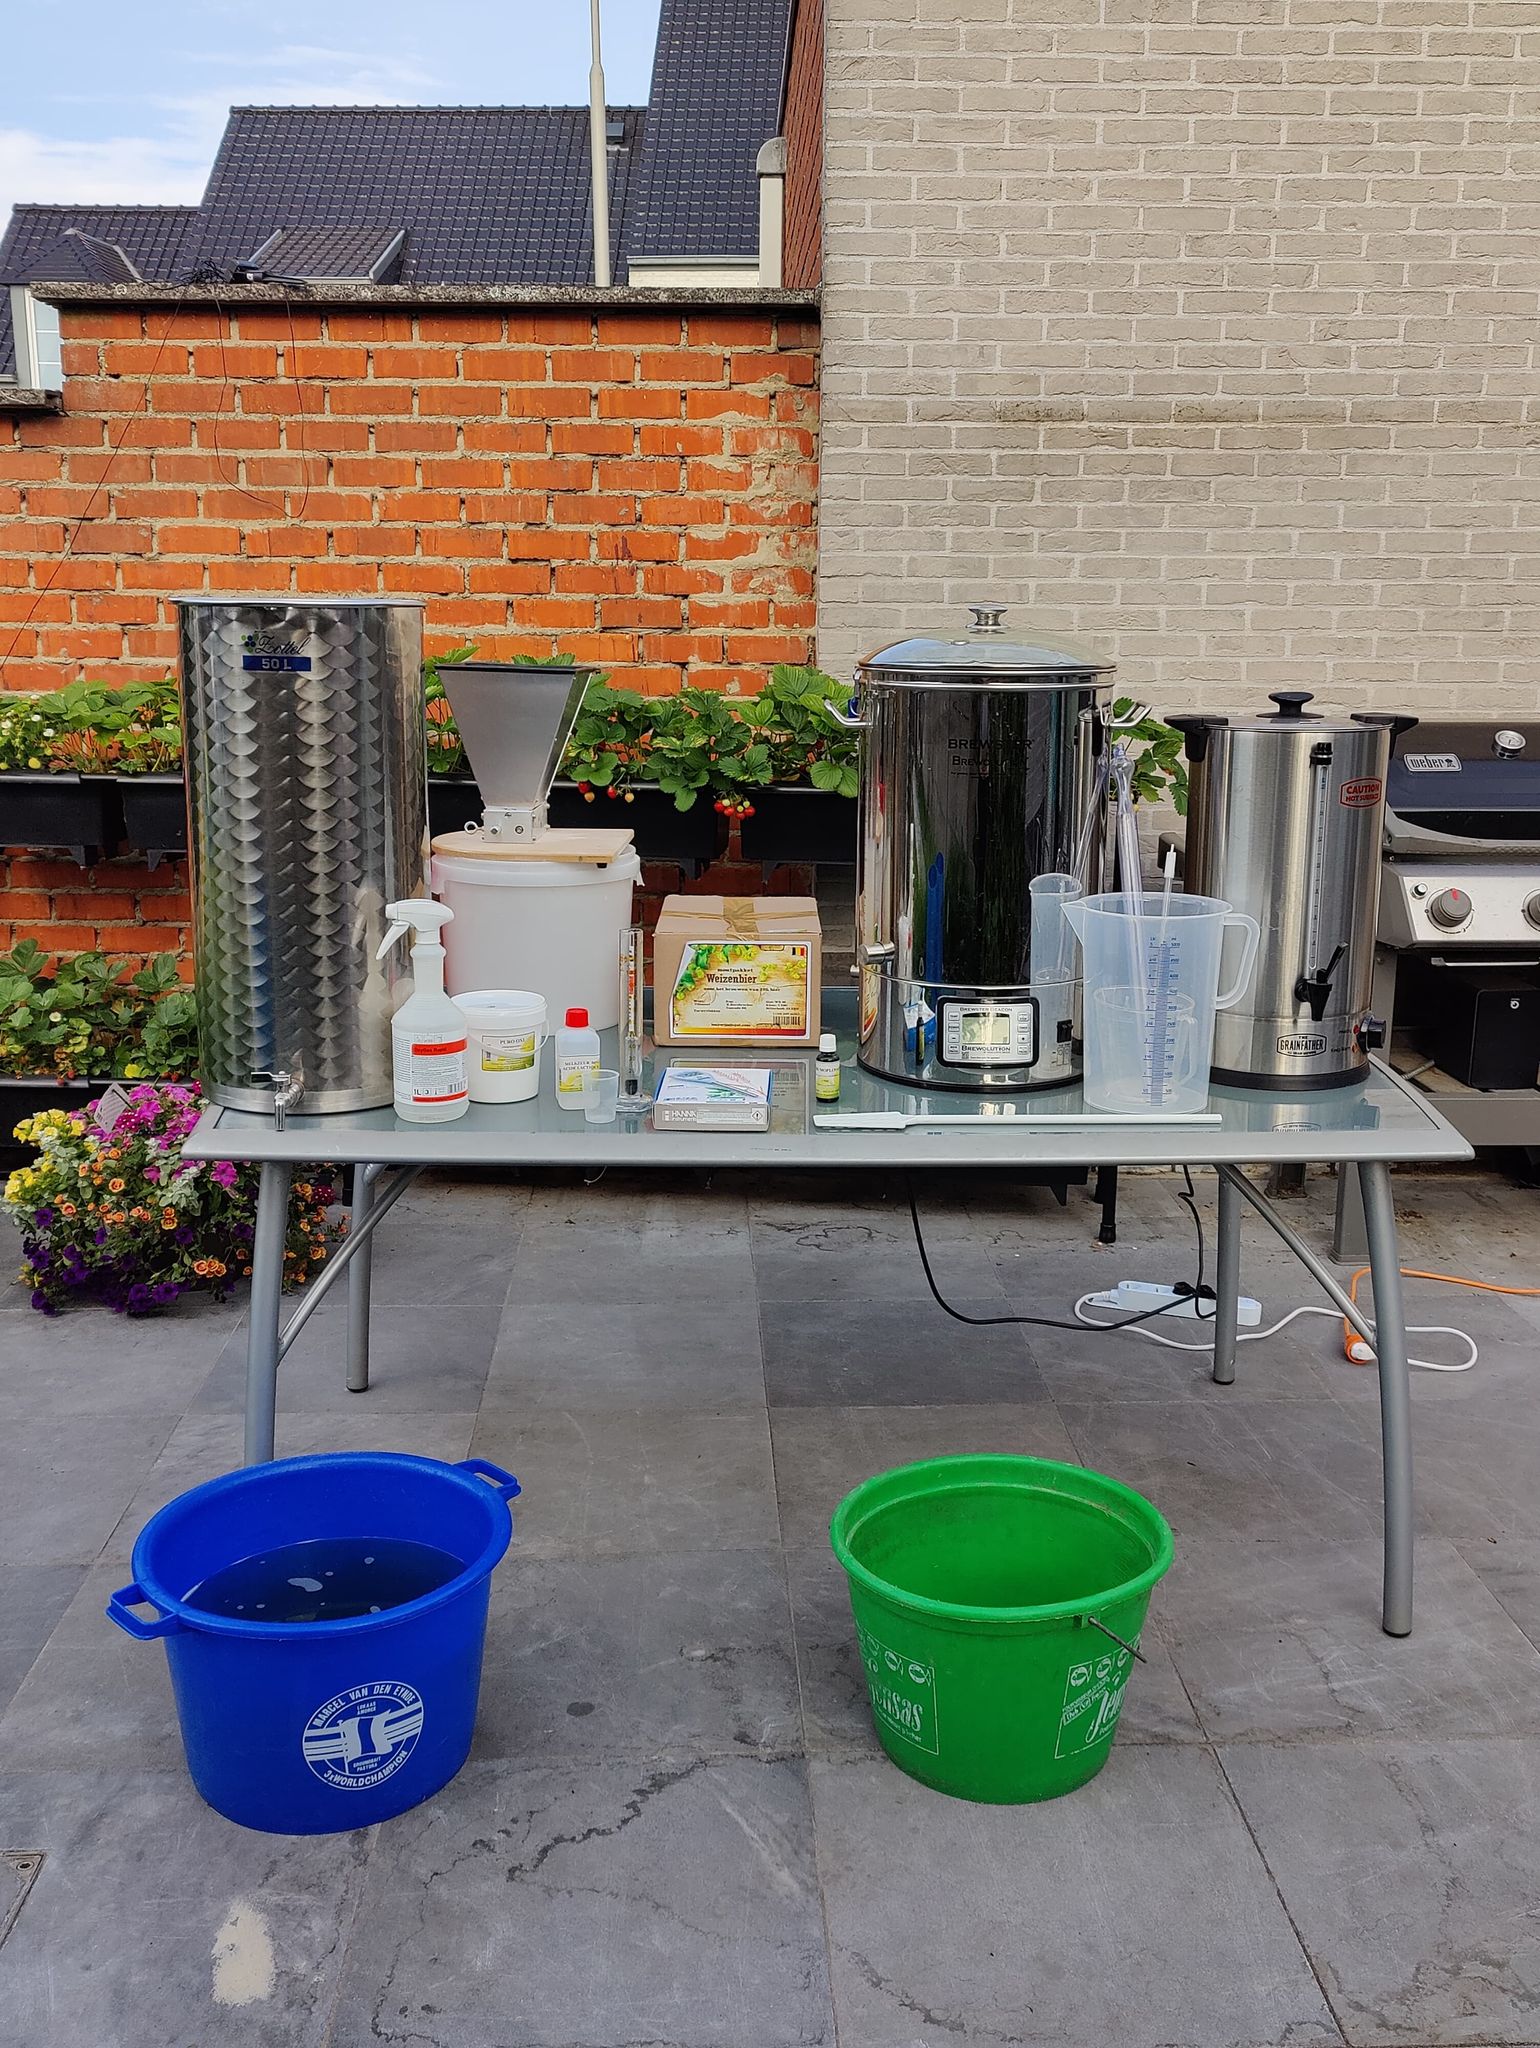
My beer brewing gear, excluding the ingredients (water, malt, hops, yeast, and additives), in an overview:
- A grain mill
- Collection bucket for crushed grain
- My automatic brewing kettle, the Brewster Beacon (40 or 70 liters)
- A mash paddle with holes
- Sanitizing and cleaning products
- Puro Oxi 1kg for sanitizing and cleaning large surfaces
- Hydrogen peroxide 'P3-oxydes rapid'
- My Grainfather sparge water heater. (You can also bring sparge water to temperature manually—usually 78 degrees)
- My Hanna pH tester for beer. You can also use pH strips, but they are slightly less accurate.
- Lactic acid 80% for acidifying my beer
- A hydrometer for measuring (residual) sugar, OG and FG (see later).
- A measuring cylinder for density measurement
- Hop bags or a hop spider
- A bottling bucket with bottling wand
- Carbonation drops or sugar for secondary fermentation in the bottle
- Bottles
- Bottle drying tree
- Bottle caps
- Bottle capper

Hygiene is king in the brewery
Now... "brewery"??? Hobby beer brewers often brew in a garage, garden shed, or hobby room/mancave. The fact is that everything that comes into contact with your grain, wort, or beer must be clean and sterile. If you clean your equipment well after a brew day and store it properly, you save yourself a lot of time. Sticky equipment or gear with residue from previous brew days means an annoying start to your brew day. On my brew day, I have a number of weapons against unwanted visits from mold or organisms that are harmful.
A large tub, basin, bucket, ... with water and soap for making beer
If you cleaned thoroughly with Enzybrew during the previous brew day, you won't need this soap and water that often. This enzymatic cleaning product (Enzybrew) cleans and breaks down organic soil after brewing beer, such as plant fibers, proteins, and starch. But even then, I sometimes still see a bit of gunk on a rack in my brewing kettle, or something doesn't feel 100% clean. In that case, I scrub it thoroughly with a dish brush. Do not use soap with a strong perfume. A mild hand soap is ideal. A cleaning tub of 30-40 liters is ideal.
A large tub, basin, bucket, ... with water and a sanitizing agent with active oxygen
All cleaned items that come into contact with your grain, wort, and/or beer go into this sanitizing tub (also 30-40 liters). I use Puro Oxi or Chemi Oxi pro in this water. These are powdered products that dissolve quickly and sanitize the equipment used for brewing beer. You have more aggressive products that disinfect even more thoroughly, but for cleaning equipment that is new or has been thoroughly cleaned after the previous brew, these 'oxi-products' are sufficient. The disinfecting component in these products is 'active oxygen'; the good news is that you don't have to rinse and can use everything immediately. While you are getting everything else ready, you can put all your equipment in the bath at the same time. After about 5 minutes, everything is sanitized.
A spray bottle based on hydrogen peroxide or a sanitizing product based on alcohol.
These spray bottles allow you to clean areas that are harder to reach. Taps, for example, or larger fermentation vessels. I use 'P3-oxydes rapid' hydrogen peroxide; you don't need to rinse with this either. The alcohol-based product also works well, but I just don't want any alcohol in my brew that didn't come from my grains. Something that is probably just in my head :)
And once you have cleaned and sanitized all your equipment, our brew day can begin ;)
Step 1 of brewing beer: Choosing your beer style and composing your brewing recipe.
Malt kits, beer recipes, and software for making beer
What beer do you want to brew? For the first 9 beers I brewed, I used malt kits. Not concentrates or extracts, but a composition of malted or unmalted grains, sometimes sugar, hops, yeast, and any additives such as coriander seeds. The malt kits take away some of the decision-making stress at step 1. You buy a 'Saison' malt kit (a beer style with a low alcohol percentage that has a dry, refreshing, and funky taste) and that guarantees you the right balance in your ingredients. This way, as a starting brewer, you can focus on the brewing process and the margin for error becomes a little smaller. Think of it as the training wheels on a child's bike. They teach you as a toddler to look, pedal, brake... without hitting the asphalt after three meters.

Malt kits take away decision-making stress
As a starting brewer, I choose a malt kit because I can focus on 'making beer' with the composition in the kit. That composition was created by someone with a lot of experience. An error in your grain composition can cause overflows during brewing, poor sugar extraction efficiency, bland flavors, or just being too bitter... I have decided that after 10 brew days with malt kits, I will try to create my own composition. Through that experience, I will gain confidence and automatic routines, which will lead me to make fewer mistakes.
Brewing apps are really super useful for building your own recipes
You can also find numerous recipes online, and there are even many apps and software where you can find shared recipes. Some apps also help you compile your own beer recipe. For example, I use the 'Brewfather' app to compose my recipes. You don't want to pour your first 4 x 20 liters of beer down the sink because your recipe makes no sense. Or worse, drink and share beer that doesn't taste good at all. In Brewfather, you can start from a beer style and add your personal touches within the guidelines of the recipe. I once brewed a Belgian white beer but tossed 4 liters of raspberry juice into the boil (raspberries juiced with a steam extractor).

If you decide to start with a malt kit containing all the well-considered ingredients just like I did, you can skip the next chapter and go straight to Step 2 (but I would definitely read step 1 as well :)).
Creating a brewing recipe yourself - What are the 4 main ingredients for making beer?
Before we move on to step 2, I am obligated to explain the basic ingredients of beer to you. Otherwise, we cannot start brewing. But I promise, I will keep it short.
Water - makes up 95% of your beer
In these modern times, we all have access to purified and safe water. That hasn't always been the case. In the past, making beer was a necessity to make the water clean. The beer was therefore not as strong as we drink it today.
You can make beer with ordinary tap water or spring water from the store if you find that valuable or if you don't have access to clean water. I have always used tap water. Some brewers look at the composition of tap water and then adjust it. You have hard water and soft water. That has to do with the amount of minerals in the water. Hard water is more suitable for crisp beers like pilsner. If you want to make a stout (a very dark beer style), you are better off brewing with soft water. But if you want to get acquainted with beer brewing, you can just use tap water. Later, an article will follow about which adjustments you can make to your tap water.

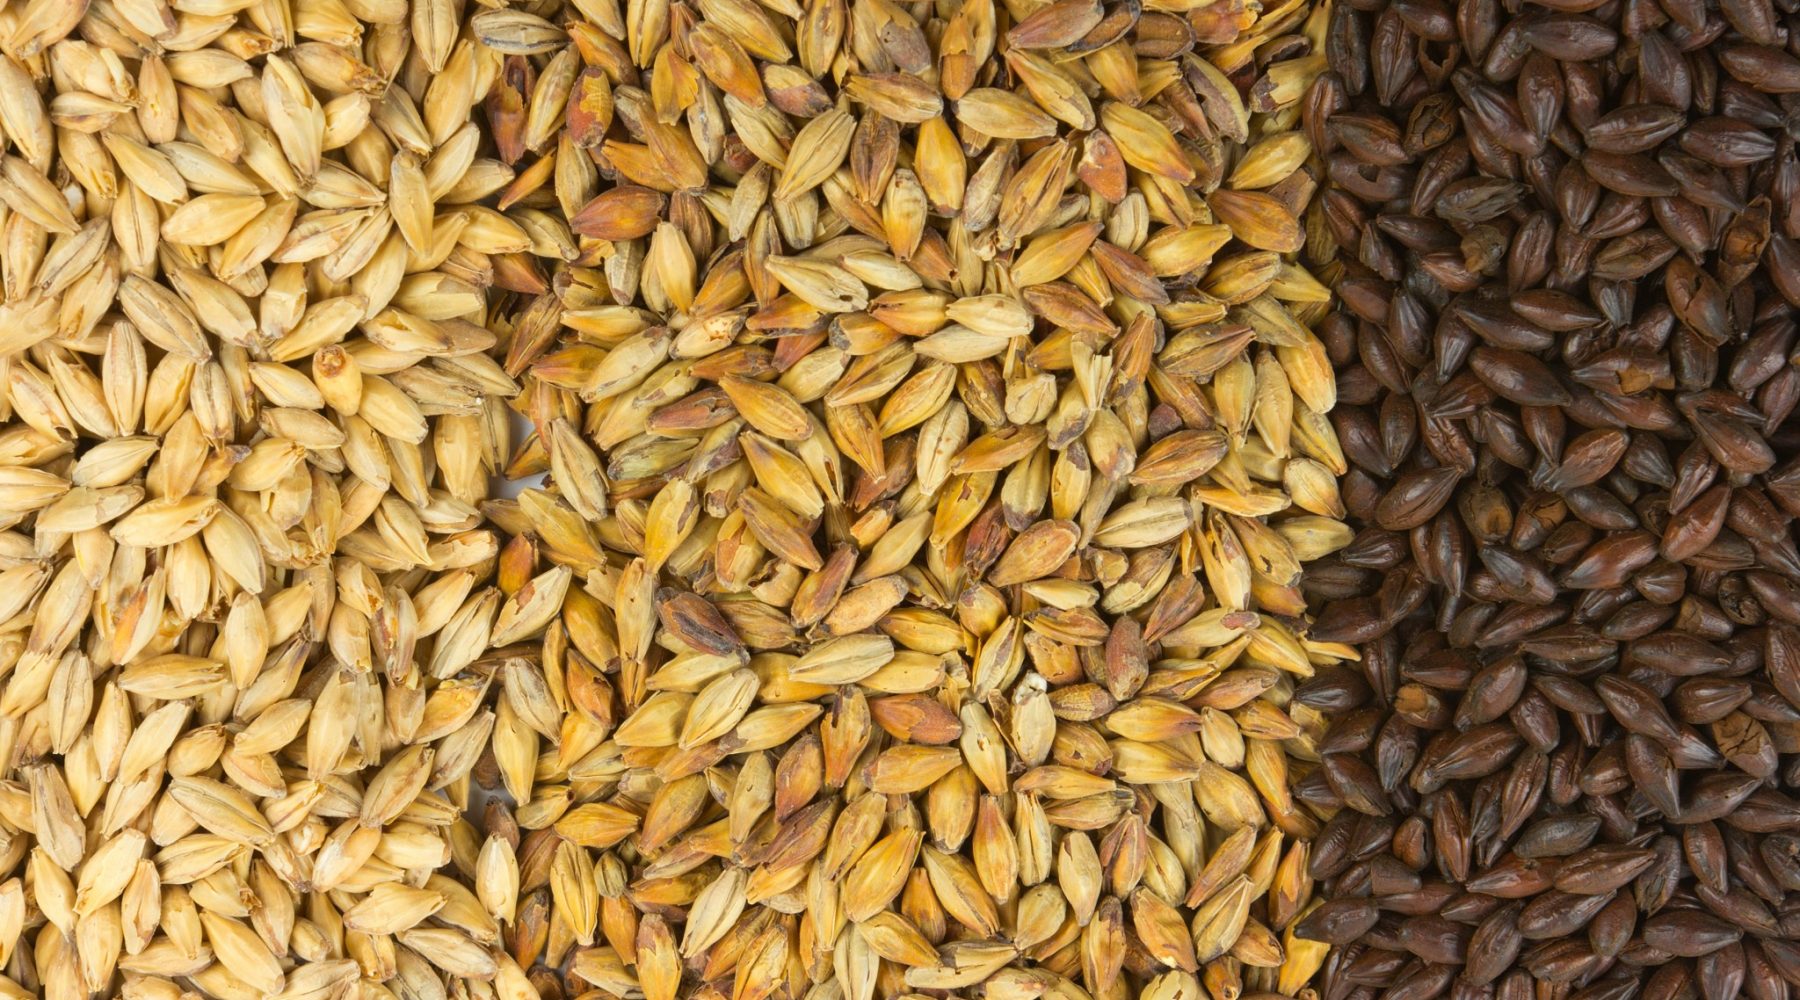
Malt - the basis for sugars and beer flavor
Malting grain is pure deception
Malting is a process in which we convert a grain kernel into malt. Here, it is important that we deceive the plant. The grain kernel, usually barley, is actually just a seed of a plant. The grain kernel is brought to the same temperature and humidity as if it were to germinate in nature and grow into a fine, proud barley, oat, or, for example, rye plant. At that moment, the seed kernel (the grain) prepares for the growth of a baby plant and, as it were, produces the mother's milk (sugar) for the plant.
And then they say at the malthouse: 'Just kidding, you're not going to be a plant, you're going to be beer! We are going to take your mother's milk out of the grain kernel and you will become Rochefort 8". Making beer is a cruel profession :) The malted grain kernels are therefore packed with mother's milk that we can extract from the kernels. I could write a lot about amino acids, enzymes, and carbohydrates, but you don't really need to know that. That mother's milk will provide us with sugar in the wort that we can ferment into beer with alcohol. The malted grain itself will also impart a lot of flavor to your beer. Different types of malt will give a different taste to your beer.

What types of malt are there?
A malty taste is reminiscent of fresh bread, caramel, or coffee. What is important to know is that the malted grain kernels, or malt, must be dried in time. Otherwise, the grains will continue to germinate into plants, and that is not the intention. Once the malt is dry, it is also sometimes scorched or roasted. The degree to which the malt is heated or roasted will determine the color of your beer. The color of malt is expressed in EBC (European Brewery Convention), which is an international standard for the color of malt. Every malt gives a different characteristic to your beer. Depending on the duration and temperature during roasting, we can categorize malts as follows:
Base malts
These are pale malt types that you can use 60 to 100% of in your beer. Even if you brew black beer (a chocolate minty stout, for example), you will still use 60% pilsner malt in your beer brewing recipe. Later, a detailed article about malt, grain, and other beer ingredients will follow.
- Pilsner malt: 2.5 - 4.5 EBC
- Pale Ale malt: 4 - 7 EBC
- Vienna malt: 7 - 10 EBC
- Munich malt: 15 - 25 EBC
Specialty malts
- Caramel or crystal malt: 5 - 450 EBC (up to 10%)
- Amber: 50 (up to 10%)
- Biscuit: 500 (up to 10%)
- Chocolate malt: 800 (up to 5%, only for Stout 8-10%)
- Roasted malt: 1400 (up to 3%, only for Stout up to 5%)
Malt types from other grains (can also be considered base malt or, if heated or roasted, as specialty malt)
- Wheat malt: (up to 60%)
- Rye malt: (5 to 20%)
Unmalted grains and other ingredients in beer
- Barley flakes: (up to 10%)
- Oat flakes: (up to 20%)
- Wheat flakes: (up to 5 - 10%)
- Corn flakes: (up to 30%)
- Rice hulls: (serves to prevent your grain bed from getting stuck, see later) (up to 5%)
When you see all these types of grains and ingredients, you understand why the rows of beer bottles in the liquor store are so long and richly stocked. As mentioned, you can already determine a lot about the style of your beer with the grains. But in the next paragraph, yet another building block comes into play. And then we have another very important ingredient: Hops...
Hops in beer: For shelf life, foam, bitterness, and aroma

Along with water, malt, and yeast, hops are one of the four essential ingredients of beer. There is no beer without hops. Hops are the flower of a plant called Humulus lupulus. The deliciously fragrant hop flowers help keep your beer fresh longer and help the beer retain its head of foam. In addition, hop flowers add a natural "hoppy" aroma, flavor, and bitterness to your beer. You can add hops to beer as dried hop flowers (usually vacuum-packed commercially) or as hop pellets (hops that have been ground and pressed into pellets).
The hop plant belongs to the Cannabinaceae family, to which Cannabis (hemp and marijuana) also happens to belong. Hops are a hardy plant and are grown all over the world. Every beer on the market today contains hops. If that were not the case, it would be a "gruit," which is essentially a beer that, instead of hops, uses herbs with witch-brew-sounding names like bog myrtle, Yarrow, heather, or juniper berry.
As an aside: the bitterness in beer can also come from fruit, herbs, and even vegetables that are added to the beer. For example: orange peel pith, spruce tips, juniper berries, and more.
Two uses for Humulus lupulus or hops in beer
The use of hops is divided into two very general groups: bittering hops and aroma hops. Bittering hops have a higher alpha acid content, making them more economical for bittering beer (a small amount is sufficient). Aroma hops will contain more essential oils. It is these highly volatile essential oils that contribute to what people understand as "hoppiness." We are talking about aromas such as citrus, pine, mango, resin, melon, and more.

By adding hops early in the brewing process, all these essential oils evaporate (boil away), either during the boil or during fermentation. That is why adding hops later in the brewing process (usually 5 minutes before the end of the boil) tends to make the beer smell "hoppier." That volatility is also the reason why the aroma and flavor of heavily hopped beers do not keep well over time. Many of the hop aromas and flavors will disappear, leaving behind a very different beer than the brewer intended.
The use of hops varies greatly depending on the beer and what the brewer is looking for. And it is this variety of applications that makes hops such a delicious and versatile ingredient to brew with. Later in this article, we will go into more depth and I will also talk more about dry hopping and wet hopping.
Beer yeasts: The greedy little monsters that turn wort into beer
Yeasts are living organisms—single-celled fungi, to be precise. In most beers, a yeast strain called Saccharomyces is used. That is Latin for "sugar fungus." That is fitting, as the yeast that goes into beer is fond of sugar. Within that genus, there are two specific types of Saccharomyces yeast that are most commonly used: lager yeast and ale yeast.

Top-fermenting and bottom-fermenting yeasts
Saccharomyces cerevisiae is a top-fermenting beer yeast, and likely the yeast that brewers were accidentally brewing with over 3,000 years ago. By top-fermenting, we mean that the yeast likes to rise to the top of the beer as it eats (creating alcohol, carbon dioxide, etc.). Top-fermenting beer yeast also ferments best at higher temperatures; most prefer temperatures between 10°C and 21°C—some 'Saison' yeasts reach 32 degrees at the peak of fermentation. With these top-fermenting beer yeasts, you can make beer styles such as wheat beers, stouts, ambers, tripels, saisons, IPAs, and much more.
Saccharomyces pastorianus is a bottom-fermenting lager yeast. This type of yeast was discovered and cultivated by Bavarian brewers a little over 200 years ago. Bottom-fermenting means that the yeast remains at the bottom of the tank while it ferments—this is also what happens during "lagering." Lager yeast prefers much lower temperatures than beer yeast: between 9°C and 15°C. Saccharomyces pastorianus is by far the most used yeast when it comes to the raw volume of beer produced worldwide. This yeast is responsible for lighter, cleaner beer styles like pilsner, lager, märzens, bocks, and more.
Some funky yeasts and others...
Besides Saccharomyces cerevisiae and Saccharomyces pastorianus, there are also other yeast strains like Brettanomyces, a very wild yeast strain that creates a bone-dry beer that is high in acidity and produces funky aromas. Something for the adventurous.
In addition to yeasts, there are also bacteria that we can use to make our beer unique. Well-known examples are the lactic acid bacteria lactobacillus to acidify your beer. Together with Brettanomyces, that is also a specialty that I will explain in a later article.
Have you decided not to use a malt kit and want to compose a recipe yourself to brew your own original beer? Then you will need to use the right ingredients in the right proportions. There are, of course, also many recipes available online that you can put together yourself with the ingredients in our webshop.
What does a brewing recipe look like?
Besides the ingredients (grain, hops, yeast, water profile, and additives) and their quantities, you will find quite a few things in a brewing recipe.
The name of the recipe.
In the recipe name, you can incorporate many things. Your name, the beer style, ingredients, and also a lot of humor. Believe me, some people are very creative with it: "Tactical Nuclear Penguin," "Audrey Hopburn," "Singing Blonde," "Tart Side of the Moon," ... If you want to share your beer with friends or even sell it, it's fun to come up with beer names. You can link it to a theme related to a passion of yours (music, fantasy, the region where you live, ...)
The style of the beer in your recipe
You have many types of beer. From Imperial IPA, Belgian Blond Ale to Bohemian Pilsner. The variety of ingredients are the brewer's playthings. Every beer style can be easily imitated, but perfecting it requires insight, taste, and often patience. I will write another article later about the different beer styles.
The volume of your strike water, sparge water, and final beer.
The strike water is, quite surprisingly, the volume of water with which you start your brew day in step 3. You need the sparge water in step 4, and the volume of your final beer is the volume of beer that you will very proudly share with your friends and acquaintances after step 9.
The efficiency of your brew.
What yield do you get from your beer? This is expressed in percentages. More on this later in step 3, mashing.
Some abbreviations in brewing recipes:
OG: Original Gravity. That is the total amount of sugars in your wort before fermentation (start of step 7). E.g.: 1092
FG: Final Gravity. That is the total amount of sugars remaining in your beer after fermentation (end of step 7). E.g.: 1019
IBUs: This figure refers to the bitterness expected with the composition of your brewing recipe. These values lie between 4 and 100.
ABV: This is Alcohol by volume or simply put 'the percentage of alcohol in your finished beer'. So you can also calculate this with a tool by entering your OG and SG. In the case of the example above, you end up with a sturdy beer with 9.8% ABV.
The mash schedule you must follow
In this process, we extract sugar from the grains (see later, Step 3). On the one hand, fermentable sugars and non-fermentable sugars. This is very important information because it can make the difference between a beer with a crisp and dry mouthfeel or a beer with a full, sweet, and creamy mouthfeel. The mash schedule often also includes the desired pH (acidity) of the wort. More on this later.
At the end of the boil time, I remove the hop bags and sanitize my wort chiller. More on that later...
The boil time of your wort
This happens in step 5 and is also an important aspect of a brewing recipe. During the boil, your wort is sanitized and you add the hops. The hop additions are also mentioned. That can be at the beginning and end of the boil (step 5). It can also be at the start of cooling and later in the cooling process (step 6), and you can also add hops during the fermentation of the beer, also called dry hopping (step 7). If you add hops in steps 5, 6, and 7, you can call your beer a triple hop. Heavily hopped beers are very popular, but be careful not to overdo it.
The yeast you use
Besides the type of yeast, the fermentation temperature may also be mentioned. In a brewing recipe, you sometimes also find whether a yeast starter is desired and the number of yeast cells you need (the latter I have never measured, and I have never had any problems with the fermentation of my beer).
Now that your recipe is ready and you have all your cleaned equipment and ingredients together, we can brew beer...
Step 2: Crushing the grain
What is grain crushing?
In a subsequent step, we are going to mash the grains (malted or otherwise) (step 3). That is a process to release flavor and sugar from the grain. To make the flavor and sugars available, the grain kernels must be made smaller. That is why we crush the grain. Crushing is not grinding, but breaking the grain kernels. I use a grain mill to do that. The grain mill contains a stainless steel hopper at the top and two rough cylindrical rollers at the bottom that are +/- 1mm apart. With a power drill, I can make one of those cylinders turn. When the grain kernels pass through the rollers, the walls of the kernels are broken open, so that the starch is released. There are also manual grain mills, but they are slow and tiring.
With a power drill, grain mill, and a 16-liter plastic bucket, I can crush 5 kilos of malt or grain in 1 minute.
For your information: In this phase, I often speak of grain and not malt because you can also work with unmalted grains.
Milling just right for a nice grain bed
Milling is very important with an eye on the remainder of the brewing process. When mashing in step 3, water is heated to release the sugars in your grains. If your grain is ground too finely, the water will be repelled. Think of a bowl of flour that you pour water over; the water will just sit on top. Whereas if you have a combination of starch and coarser husks (the outside of the grain kernel), the grain bed will be nice and permeable. To mash, we need a combination of coarse particles (husks) and fine particles (starch). In my brewing kettle, I constantly pump the water from the bottom back over the grain bed to get all the flavors and sugars into my wort. With grain that is too coarse, you get too little flavor and starch (sugars). With grain that is too fine, your kettle will overflow and your water will never reach all the starch.
For standard recipes, set your grain mill to 1.0 and you are safe.
Which grains do you mill?
It doesn't hurt to mill all the grains. Oat or corn flakes are already rolled, so you could add them entirely as the first ingredient in the mash water. But for convenience, and also because some flakes are still quite large, you can just mill them along with the grain.
If all is well, we now have a collection bucket of milled grain with which we are going to make our mash. Mash sounds like a term for baking cakes, but no, it will become beer :)
Step 3: Mashing your milled grain or making the mash
It is gradually getting serious; while we now still have water and grain separately, we will soon have wort. That transformation happens during the mashing. If I were to explain it 'for dummies': You bring water and milled grain step by step to a certain temperature with rest periods. The different temperatures do different things to the beer in the making (see further point 3.1). In the brewing kettle, the mash that is becoming wort is constantly pumped from the bottom to the top of the kettle. This filters the wort until it is clear in the grain bed. At the end, you rinse your grain bed again with water (step 4) to get the last bit of flavor and sugars out of the grains, and then you can boil it.
How does my Brewster Beacon brewing kettle work?
An automatic brewing kettle is a super good idea; I would never want to struggle with gas fires, thermometers, and mash bags again. A brewing kettle consists of the following components:
The brewing kettle and the grain bed
First and foremost, it is a stainless steel kettle
At the bottom, there is a heating element that heats the water that later becomes wort.
A module with a display. Here you can set and even program the mashing steps. You can set the time, the temperature, and the power that the brewing kettle should produce. More on mashing steps later.
Inside the kettle, you place an included cylinder with a removable grate at the bottom. The cylinder with the grate forms, as it were, a cage that hangs +/- 10 cm above the bottom with the heating element. Therefore, your grain cannot burn. You pour your grain into that cylinder, and after the grain is added, you place a second grate on top. This way, you create a grain bed between two grates that effectively replaces the mash bag. Because the cylinder with the bottom grate, grain, and top grate rest a few centimeters above the bottom of your brewing kettle, your grain can never burn on the bottom of your kettle. An overflow pipe also runs through the cylinder of your grain bed. Suppose your grain bed clogs up and your circulation pump is on; the wort can flow back down through the overflow pipe.
At the very bottom of the kettle, there is also a very fine grate that stops particles that might still wash through the cylinder and grates. This way, these also cannot burn or cake on.
My Brewster Beacon 40-liter makes brewing beer wonderfully relaxing due to its simplicity. It always tells me what to do.
The circulation pump and the sight glass
A circulation pump. This is also a very interesting part of my Brewster Beacon. The efficiency of your brew is so much greater if you can continuously pump the water from the bottom back over the grain bed. You can also use this pump to pump the wort into a fermentation vessel after the boiling process. Very handy. You can regulate the flow rate of the circulation pump with a small tap. For example, the higher the mash temperature, the less permeable the grain bed is. At higher temperatures (+/- more than 60°C), it is best to turn the pump down a bit.
A sight glass. This way, you can see the level of your water in the kettle at all times. That is not only useful for information; it also warns you if, for example, the grain bed has clogged and no longer lets water through to be pumped back onto the grain by the circulation pump. If, for instance, you only see 10 liters of water left in your sight glass, you know that there is a lot of water sitting on top of the grain bed and not passing through it.
Enough babbling, now we are really going to start brewing beer :)
3.1. Heating water, adding grain and protease or protein splitting
I fill my brewing kettle with the initial water. In the recipes for my Brewster Beacon 40-liter, I start with 20 liters of initial water or mash water; you can go a bit higher if you want, but 20 liters of initial water works comfortably. I set my brewing kettle to 52°C. During the heating process, I place my fine grate on the bottom of the brewing kettle. Then I place the cylinder with the bottom grate. There is an overflow pipe on the bottom grate; extend it sufficiently and place the plastic cap on the pipe. This prevents grain from getting into the overflow pipe while adding. Place the grates and cylinder after filling your kettle; otherwise, your water volume will not be reliable.
Tip: Fill your GrainFather sparge water heater now with the sparge water and set it to 78 degrees. This way, you won't lose time later in step 4.
This water heater helps me bring my initial water to 50°C while I'm getting everything ready, and it also heats my sparge water to 78°C, easy!
A good grain bed for maximum extraction of flavor and sugars
When my brewing kettle reaches 52°C, I get a signal from the brewing kettle and add my milled grain. Add the grain in stages and stir with your paddle with holes into the grain to avoid air bubbles in the grain bed. Bring the paddle from the bottom of the grain to the top. Do not stir as if you are stirring soup, but bring the grain from the bottom to the top. Depending on how much grain you need to use in your recipe, I add the grain in 2 to 4 portions, stirring in between each time.
For information: beer recipes with more alcohol usually have more grain in proportion to a lighter beer, where you usually have less grain.
Once all your grain has been added and there are no more air bubbles in your grain, you can stop stirring and place the top grate. Now also remove the plastic cap from the overflow pipe. The overflow pipe may extend a few centimeters above the level of your mash. Should the water level rise due to a clogged grain bed, your kettle will not overflow but the water can return via the overflow pipe into your bottom grate.
Tip: If your grain bed clogs, it is likely due to an incorrect composition of your grains.
First splitting of proteins or protease
Due to the addition of the milled grain, the temperature drops to 50°C, which is the ideal temperature for the protease or protein splitting. These proteins are split by the protease enzyme. The proteins must be broken down because otherwise, they cannot be converted into fermentable sugars. This phase is also important for foam formation later on. If you want a nice head of foam, be sure to carry out this step well.
After adding and stirring the grain, I also switch on the circulation pump of my Brewster. This pump brings the water from underneath the grain bed back to the top. We can now let the pump run for the rest of the mashing process and keep the lid on the kettle. You can lead the hose of the circulation pump through the lid of the brewing kettle. The mash, which is what your brew is called in this phase, now remains at 50°C for 15 to 30 minutes, and then we are ready for the next step.
Setting the temperatures is child's play; you can even set your mash schedule on your brewing kettle.
3.2. Brewing beer: Further heating the mash for beta-amylase
Now that the proteins have been broken down by the previous step, we are ready for the next step: beta-amylase. Quite illogically, this comes before the alpha-amylase; I didn't invent it either :) . I could explain beta-amylase very scientifically, but it doesn't really contribute enough to this article. The fact is that you heat your mash to 61 to 67 degrees for the beta-amylase. Depending on which beer you are brewing, this phase lasts about 30 minutes. The Brewster Beacon starts counting those 30 minutes from the moment the desired temperature (e.g., 62°C) is reached; the time taken to heat from 50°C to 62°C does not count. In this phase, the fermentable sugars are created. The sugars that the yeasts will soon convert into alcohol. The longer your grain stays in this phase, the more fermentable sugars you have and the drier your beer will become.
In between: If you look at the wort being pumped to the top of your kettle, you will notice that it has become clear because it is constantly filtered in the grain bed.
Another tip: Keep an eye on the sight glass and, if necessary, adjust the flow rate of the pump with the tap if your grain bed allows less water through. You can see this in the sight glass if the level rises there.
3.3. The acidity measurement from 60°C
As soon as your mash has reached the temperature of 60°C, you can measure your pH. You can do this by taking a small amount of beer into a measuring cup and inserting a pH meter for beer. At this moment, the pH should be brought to between 5.0 and 5.4. Depending on the beer style you are aiming for, what you find tasty yourself, or what your brewing recipe advises. The pH of my wort is usually too high because there is a lot of lime present in my tap water. I already know in advance that I need to add 15 ml of lactic acid to the wort to end up at 5.4. But that is different for every water type and every brewer.
With lactic acid and a pH meter, you can adjust the pH during mashing. Normally, pH is measured at 20 degrees; the Hanna pH meter for beer corrects the pH based on the temperature of your wort.
Attention: With the Brewster Beacon, your water is circulated from the bottom of the kettle to the top. Therefore, if you add your lactic acid at the top of your kettle, it takes some time to 'circulate' before the added lactic acid is evenly distributed. Do not be alarmed if you suddenly measure a pH of 4.2. Wait at least 15 minutes after adding lactic acid to measure your acidity in the Brewster Beacon again and adjust if necessary.
3.4. Alpha-amylase provides non-fermentable sugars
If you want more body in your beer in the form of residual sugar, you can release non-fermentable sugars from the grain. Alpha-amylase occurs between 65°C and 73°C. Definitely do not go above 75°C, otherwise, alpha-amylase stops. Alpha-amylase lasts a maximum of 20 minutes and thus ensures more residual sugar in your beer.
If you have paid close attention, you will notice that there is an overlap between the temperature zones in beta-amylase and alpha-amylase, specifically 66°C. This means that you can actually do both the beta and alpha amylase in one go. You can perfectly mash your mash at 66°C and brew a perfect beer. Many English and American beer styles are mashed at one temperature. Belgian beers have a tradition of 'step-mashing,' which means the mashing process goes through protease, beta-amylase, and alpha-amylase separately.
3.4. Stopping the enzyme activity
By letting the temperature in my brewing kettle rise to 78 degrees, I stop all enzyme activity. The mashing is finished. Because I work with a Brewster Beacon, I no longer have to filter. My wort has become super clear. With a traditional brewing kettle and mash bag, you still have to filter your wort. With a brewing kettle with a circulation pump, the wort is clear and we can go straight to step 4.
During the mashing process, I stir regularly; I do not always mount the top grate of the Brewster of the grain bed, which makes it easier to stir.
Step 4 in beer brewing: Rinsing the grain bed
Now that all (or at least almost all) sugars have been removed from the grains, you can use the included handle to set the cylinder from the Brewster Beacon to two higher positions to let your grain bed drain. We want to get the last drops of delicious wort out of the grain. Even more, we are going to rinse the grain bed again by evenly pouring some more sparge water over it. I heated my sparge water earlier in my GrainFather sparge water heater. The sparge water for a batch of 20 liters is usually around 8 liters. But there are many ways to brew beer, and some recipes might specify other quantities.
Tip: During the draining process, I already set my Brewster Beacon to its boiling temperature. Because of the draining wort from the grain bed into the cylinder, the temperature drops again in the kettle. By already entering your boiling temperature now, the temperature remains stable and it starts to rise after rinsing. This way, you don't lose any time ;)
The amount of sparge water can be in the recipe you are using, but you can also supplement your wort with sparge water until you have 20% more than your starting volume of mash water.
E.g.: starting water is 20 liters; after mashing, you see in the sight glass, for example, 16 liters of wort left. A portion has been absorbed by the grain or has evaporated. Rinse your grain bed until you have 24 liters of wort left (your original mash water + 20%). I find this a good formula, and it works fine for me. There are also calculators that take into account how much grain you used and such, but I am satisfied with the topping-up method up to the volume of mash water + 20%. And with that 24 liters of delicious wort, we move on to the next process: Boiling.
During the last 10 minutes of the boil, I add my wort chiller, and if everything is boiling well again, you can let your aroma hops swim along in a hop bag for a while to release aromas.
Step 5 in beer brewing: Boiling the wort with hops & co
Unfortunately, we still do not have a delicious, foaming beer with alcohol. What we do have is wort that we are going to boil. During the boiling process, we are going to add hops, any aromatics, and possibly a clarifying agent. More on that later.
There are several reasons why we boil the wort and do not ferment it directly into beer. We boil the wort between 60 and 90 minutes.
5.1. Making your wort sterile and flavorful
The boiling process makes your wort sterile. Should anything have gotten into your wort that could ruin things, it is also killed off by this. During boiling, a lot of water also evaporates, which makes the taste more intense.
5.2. Bringing the bitterness and aromas of the hops into your beer
During the boiling process of brewing beer, we add hops to the beer. You cannot brew beer without hops; otherwise, it is not beer. 45 to 60 minutes before the end of the boil, we add bittering hops for the beer's flavor, specifically the 'bitter' flavor component. 5 to 10 minutes before the end of the boiling process, we add aroma hops. These are not always different varieties of hops. Only the timing of the addition causes bittering hops to release more bitter flavors because they remain in the wort longer, while aroma hops release their aromas only during the final minutes of the boiling process. There are fancy variations with additions at other times during the boiling process, but let's stick to these two moments. I will write a separate article about hops later, as there is a lot to say about that as well.
There is a huge number of hop varieties, with about 80 types commonly available. Usually, hop varieties are tied to a region and even to the beer style of a region. Hops are the cone-shaped flowers of the hop plant, or Humulus lupulus. Some hop varieties are better suited as bittering hops, others as aroma hops.
With its bitterness, hops are the ideal counterpart to sweet malt, which often brings grain, bread, caramel, or cookie aromas to beer. In addition, aroma hops, which we add late in the boil, bring a wonderful perfume of citrus, flowers, strawberries, cedarwood, ginger, ... into your beer. Not all flavors at once, of course, but by combining the right hop varieties, you can bring a lot of complexity to your beer.
Alpha and beta acids in hops
Hops come with two important values: Alpha acids and Beta acids. Alpha acids are the most important acids. On one hand, they give your beer the necessary bitterness, and on the other, the aromas that make your beer so interesting. Alpha acids also have an antibacterial effect, which is why hops were initially added to beer—to help it keep longer. Much less is known about what beta acids do; they are thought to play a larger role during the lagering or storage of beer, but research into their function is still ongoing.
By combining hop varieties and the timing of the hop addition, you can determine the bitterness of your beer. This bitterness is expressed in IBUs, which stands for International Bittering Units. Based on the alpha and beta acids in your hops and the timing of the additions, you can calculate the IBU of your beer. It is a scale from 0 to 100. A beer with 70 IBU is quite bitter, while a beer with 20 IBU is quite light.
source : Westcoastbrewer.com
With brewing software like Brewfather, you can easily track the IBUs as you create your recipe.
5.3. Adding other flavors to your beer during the boiling phase
As if we didn't already have enough factors besides malt, grain, and hops to give our beer a personal touch, we can also add plenty of other things during the boiling process. Cinnamon, cloves, star anise, coriander, raspberries, ... I won't go into too much detail here, as we are sticking to the basics in this article. Additives in brewing seem like an interesting topic for a future article.
This yeast nutrient
5.4. Adding yeast nutrient during the boil
Later, in step 7, we will ferment the cooled wort into beer. During the fermentation process, which I will explain in detail later, you will read that yeast needs two important things during fermentation:
Oxygen to multiply
Nutrients to stay alive: these are vitamins, minerals, and other complex things that we, as non-specialists, don't really need to know about. The nutritional elements are actually contained in a well-brewed wort. But if you want to play it safe or have had problems with fermentation in the past, you can add yeast nutrient.
Here I am cooling my wort. Cold water enters the cooling coil on the left, and on the right, it goes to my rain barrels for the vegetable garden.
Step 6 Cooling the wort - on to fermentation
6.1 Cooling the wort as quickly as possible
This is a critical moment because from now on, we must work very hygienically. After the boil, it is best to cool the wort as quickly as possible to a temperature at which you can start fermentation. At this moment, you can also add hops to your beer again. This is sometimes called 'at flame out'. You can add extra hops that will release even more aroma at lower temperatures than during the boil, with very little bitterness. This is often done for IPAs, for example, where you want a lot of hop aromas.
I cool my wort in my Brewster Beacon using a wort chiller. The wort chiller is super convenient because it has standard garden hose couplings on it. I bring cold water from the rainwater tank into the chiller, and I collect the warmed water from the outlet to wash the car or I let it cool down again to give to the plants in my garden. I clean my wort chiller and place it in my brew kettle 10 minutes before the end of the boil. This way, it can become sterile if it wasn't already. This allows me to cool my wort from 100°C to, for example, 20°C in 10 to 20 minutes.
If you have added hops at this stage, you can create a whirlpool in your beer so that the hop sediment settles in the center of your Brewster. The built-in pump in the Brewster Beacon then pumps the wort from the edge of your brew kettle to the fermentation vessel or fermentor.
A wonderful brew day in my slippers :) Here I am measuring the OG of the wort.
6.2 Performing measurements after cooling: SG and FG
After you have cooled the wort to +/- 20°C or the temperature at which you wish to start your fermentation process, you can first perform a few measurements.
Specific Gravity or density before fermentation
At this moment, it is important to measure your SG or specific gravity. This is the density of your wort; sugar is heavier than water, so you can perfectly determine how much sugar is in your beer. A wort can, for example, have an SG of 1062. You measure the density or SG of your wort with a density meter or hydrometer. It is best to take some wort out of your fermentation vessel with a sanitized wine thief and put it in a 100 or 250 ml measuring cylinder. Let your density meter float in it and read your SG or density. Note this value carefully; you will need it later to calculate the alcohol percentage in your beer.
A wheat beer is quite light; this wort has an OG of 1052.
Final Gravity or density after fermentation
Your brew recipe shows not only an SG but also an FG or final gravity, which is the density after fermentation. That value is usually between 1004 and 1020. The higher the value after fermentation, the more residual sugar remains in your beer and the more coating the mouthfeel. The lower the FG, the drier your beer and the crisper the mouthfeel. Beers with an FG towards 1020 are more often beers that you drink slowly, and the crisper beers with an FG of, for example, 1006 are the easy-drinking ones and/or thirst quenchers.
Example: An IPA with an SG of 1059 and an FG of 1017 gives 6.2% alcohol. In English, this is also called ABV (Alcohol by volume).
Tip: Not all sugars present in your beer are fermentable. The warmer you mashed, the more non-fermentable sugar your beer will contain. Your yeast strain also plays a role. Some yeasts convert more sugar into alcohol than others. Others die off at a certain alcohol percentage; in that case, you are left with residual sugar in your beer. Still other yeasts can handle much higher alcohol percentages, which is useful if you want to brew an Imperial Stout of 12% ABV.
Step 7 Let your wort ferment - Incredible, finally beer!
Brewing beer is a work of patience, but now we have actually arrived at alcoholic fermentation. A process in which yeast will convert the wort into beer. The sugars we extracted from the grain in step 3, we are now going to ferment. Fermenting is the conversion of sugars into alcohol with CO2 and heat as byproducts. And the workhorse that gets that done is saccharomyces cerevisiae (top-fermenting) or saccharomyces pastorianus (bottom-fermenting). There are other yeast strains and bacteria that convert wort, but in 99% of cases, we brew beer with one of these yeast strains.
7.1 There are many types of yeast to brew beer.
There are many types of beer yeast and brands of beer yeast. Every beer style has its own brand, such as the LALLEMAND WildBrew™ Philly Sour, with which you can brew sour beers. Although there are also general beer yeasts such as SafAle US-05 from Fermentis, with which you can brew many dry, fresh American-style beers.
There are dry yeasts and liquid yeasts. As a beginning brewer, it is best to use dry yeast. You can sprinkle this over the wort in your fermentation vessel and place a clean towel over your fermenter. With liquid yeasts such as the Biergist WYEAST XL 1214 Belgian Abbey, it is best to make a yeast starter first. More on this in subsequent articles.
7.2 Pump the wort into the fermentation vessel
After the boil, we want to ferment clean wort. Most suspended particles were caught in the grain bed during mashing. But if you added hops at flame out (at the start of cooling), you can create a whirlpool with your mash paddle to get all the sediment of the wort and hop remains to the center of the brew kettle. Afterward, as mentioned before, you pump your wort into a clean and sanitized fermentation vessel or bucket.
You may do this from a height so that the stream of wort splashes into your fermentation vessel from above. The oxygen you now add to the wort will help with the fermentation we are about to start. Place a tea or dish towel on your fermenter and wait for the 'magic' to begin. You don't need to put an airlock on your fermenter right away; we'll do that later. If you are naturally forgetful or don't have a clean towel, you can also immediately put the lid with an airlock on your vessel.
How does that fermentation proceed?
7.3 The aerobic phase and the anaerobic phase in the fermentation process
When brewing beer, yeasts do not immediately start their main task of 'converting sugar into alcohol.' First, the yeast cells must multiply until there are enough of them to start their mission. The oxygen we just added by 'splashing' comes in handy now. The yeast cells need oxygen to multiply. As already mentioned, we sprinkle the dry yeast on the surface of the wort or pour the yeast starter into the cooled wort. Respect the fermentation temperature recommended by the manufacturer for the fermentation. If you ferment too warm, you get nasty off-flavors; if you ferment too cool, the fermentation can stall.
"I assure you, the first time you brew, you will go to look at your fermentation vessel or bucket every 5 minutes :)
After 12 to 36 hours, you will see bubbles on the surface in the 'aerobic phase'; the yeast cells are multiplying. As described earlier, you can cover your fermentation vessel in this phase with a clean tea or dish towel. As soon as you also smell CO2, the anaerobic phase has started, and the main task of your yeast has begun: converting sugar into alcohol with CO2 and heat as byproducts. You can smell the CO2 very easily; it also stings in your nose. Now the 'magic' is happening, and it is also time to place the lid on your fermentation vessel with an airlock. The space between the lid and the wort/beer-in-the-making should be between 1/2 and 1/4 of the total volume of your fermentation tank. Brewing beer ... delightful.
Here, my colleague Sarah adds the yeast herself to the wort that has just come out of the brew kettle. The birth beer for her baby Guillaume was a delicious, crisp, and fresh 'Saison'. The foam on the wort is caused by the splashing during transfer. By introducing oxygen into the beer, it can ferment better. After fermentation, however, you must avoid oxygen in your beer.
7.4 Primary fermentation versus secondary fermentation
When brewing beer, we speak of primary fermentation and secondary fermentation during the fermentation process. This all happens in the fermentation vessel. Later, we also do a bottle fermentation, but that is not what this is about (yet). The primary fermentation includes the aerobic and anaerobic phases I just explained. The primary fermentation runs until the point that almost all sugars in the anaerobic phase have been converted into alcohol.
Aside: Baker's yeast or other yeasts are, by the way, out of the question; we do not brew beer with those yeast strains.
Primary fermentation when brewing beer
You will notice that the airlock goes wild during the first few days of the anaerobic phase. Glug, glug, glug, ... sometimes every second or more often. I repeat here again, respect the fermentation temperatures that are on your yeast packaging. If necessary, put your fermentation vessel in a cooler or warmer place, or work with a cooling chamber or freezer with a thermostat where you can regulate the temperature yourself.
tip: A warm-fermented Belgian strong ale (Duvel type) is better to brew in the summer, and a cold-fermented Czech pilsner is better in the late autumn, winter, or early spring.
After about 3 or 4 days, you will notice that the bubbling of your airlock decreases. That does not mean your beer is ready, far from it. Your primary fermentation is finished when your FG, your final gravity (or final density), has been reached. How do you know that your FG has been reached? When your airlock slows down, measure your beer regularly, let's say every day, in a clean, sterile way. Using a sanitized wine thief, take 100-200 ml (or otherwise depending on the volume of your measuring cylinder) out of your fermentation bucket. This works fine using the tap at the bottom. Insert your sanitized hydrometer into the measuring cylinder and read the value.
If you see no change in density for a period of 3 days, then your final density has 'likely' been reached and the primary fermentation is over. Exceptions are when your fermentation has stalled for other reasons, such as temperature fluctuations or a lack of yeast nutrient. A well-brewed wort normally contains enough yeast nutrient, so the chance that your yeast will run out of nutrients is small.
This Brown ale has been transferred to a new vessel after the first fermentation; fuller bottles (less oxygen) and an airlock apply here
Secondary fermentation
Actually, it's not a fermentation, yet it's called 'secondary fermentation' or 'secondary' for short in 'beer-speak'. Note, this is not 100% necessary, but it gives a rounder taste to your beer and gives your beer the chance to clarify even more. The more complex the beer, the more benefit it gets from a secondary fermentation. This lasts between 2 days and a few months. For an average beer, I would say 1 to 2 weeks. If you are brewing simpler beer, a few days. For super-complex beers like an Imperial Stout, this can be 3 months. How do you proceed?
After your density no longer drops for 3 days, you transfer your beer to a new vessel. This is another moment when oxygen or other organisms can get into your beer. So, work as sterilely as possible and transfer without too much splashing of the beer. During a secondary fermentation, we transfer the beer because the yeast cells that are still present no longer find sugar and will consequently want to convert other things, such as dead yeast cells. That can cause very unpleasant aromas in your beer, such as rubber.
Transfer to a clean vessel. I have stainless steel vessels or tanks with a floating lid. That ensures that I can place the lid a few mm above the beer. This way, I avoid contact with oxygen during the secondary fermentation. If your vessel is not full after transferring, throw a lump of sugar into your beer. It will be immediately fermented, and a protective layer of CO2 will form between your beer and the lid.
Step 8 : Cold stabilization or cold crashing
Let your beer shiver
This technique consists of putting your beer in the cold. I do this in a freezer where I mount a thermostat in between, and thus I can create a temperature just above the freezing point. Do note: if your beer freezes, very many flavor and aroma components will be gone. I once had this happen with a Belgian Strong Ale, and the taste was terrible. Since then, I lower the temperature on my thermostat by 5 degrees at a time down to 1 or 2 degrees Celsius.
If my freezer is at 20°C, I first bring the temperature to 15°C, 12 hours later to 10°C, then again 12 hours later to 5°C, and finally to 2°C. From 20°C to 2°C, the freezer runs at full power for so long that the bottom of your beer freezes. As a second measure, I also put a few blocks of wood underneath it so there is no direct contact with the cooling element. Since then, I haven't had any accidents.
Bottle immediately or transfer again?
If you are not doing a secondary fermentation, you can cold crash or cold stabilize your first fermentation vessel directly (without racking) in the same vessel. The reason you shouldn't do it here is because the activity in your beer has already completely ceased due to the cold temperature. During cold crashing, all solid particles flocculate and settle to the bottom. Then, after about 24 to 48 hours, you can rack it to your bottling bucket with a bottling wand to fill your bottles. Cold stabilization also ensures faster carbonation (see next step) and your beer should also keep for longer.
When do you not use cold stabilization?
When is it best not to use cold stabilization? If you want a cloudy beer like a hazy NEIPA (New England India Pale Ale), it is best not to cold crash. If you are worried about contamination or oxidation, you can also consider bottling after the first or second fermentation.
And then finally, the last step ...
Step 9: Bottling and lagering your beer.
Finally, we can bottle our beer. But wait a moment, the beer contains no fizz yet, no CO2; carbonation has not yet taken place. Many homebrewers choose to keg their beer or put it into a pressure vessel. Using a CO2 bottle under pressure, you can then carbonate your beer via a hose. But in this article, I will explain bottling in a beer bottle. The process is easy. With some sugar, also called 'priming sugar', you can start the fermentation in the bottle. For beer with a high alcohol content (from an OG of 1062), it is best to also add some bottling yeast.
9.1 To bottle, we need:
A bottling bucket with a bottling wand
Bottling yeast
Carbonation drops or dextrose for bottle refermentation
Stirring paddle with holes
Bottles
Bottle tree
Crown caps
Capper
Puro Oxi 1kg Disinfection and cleaning of large surfaces
9.2 Rack into a bottling bucket or directly from the fermentation vessel?
When to rack? If you are bottling immediately after the first fermentation, I would recommend racking once more to a bottling bucket. Also, if there is no tap on your secondary fermentation or cold crash vessel, I would rack to a bottling bucket or filler bucket.
When to stop racking? If there is a tap on your secondary fermentation or cold crash vessel, I would no longer rack, provided you no longer need to move the vessel or can move it very steadily. You don't want all the gunk at the bottom of your vessel after the secondary fermentation or cold crash floating around in your beer again.
I fill my bottles directly from the tap of my fermentation bucket or stainless steel tank. A bottling bucket is actually identical to a fermentation bucket with a bottling wand on the tap. How I proceed ...
Here I am bottling 'Sammy's Golden' together with my daughter Ella (almost 4 years old). She loves putting carbonation drops into the bottles and putting the crown caps in the capper. "Daddy, when are we going to make beers again?" she often asks. Wonderful, isn't it?
9.3 Bottling beer step by step
In preparation (you can do this during mashing or boiling)
Half an hour before bottling, I dissolve my bottling yeast in cold to lukewarm water, in the amount recommended on the packaging. 28 °C is fine. Note: above 35°C, yeast cells die. For a standard blond beer or pilsner, I don't use bottling yeast, but if you want to play it safe, you can add bottling yeast; it won't affect the taste of your beer.
I assume all your equipment is clean, free of residue and other gunk
Disinfect your bottling wand, bottles, crown caps, bottle tree, and capper thoroughly. I fill a 30-40 liter plastic tub and fill it with water and Puro Oxi (proportions on the packaging). I rinse everything thoroughly in that. Larger objects such as a large capper or bottle tree can also be disinfected with a spray bottle containing the same mixture.
You can also run bottles through the dishwasher on the hottest setting (70-75°C), which will also disinfect them.
I place my bottles upside down on my bottle tree and let them drain for a while.
I pour my caps out of the disinfectant onto a clean towel and spin them dry like I do with salad.
And now the apotheosis: Finishing your beer :)
Next, I fill my bottles with sugar or carbonation drops (priming sugar) that will perform the second fermentation in the bottle. You can also put dextrose or grape sugar in your bottling bucket. Dextrose dissolves much better than granulated sugar, for example. On average, we use 8 grams per liter of beer. But that also differs according to the beer style you want to brew. I will write a separate article about this with a table per style.
Now also pour your yeast starter into your bottling bucket if you made one. Take your stirring paddle and gently stir the yeast and any dextrose (if you aren't using carbonation drops in the bottle) together. Do not introduce oxygen into your beer by stirring like crazy.
Ready to bring your bottle tree closer. Make sure you can work comfortably. Sitting on your knees or standing hunched over is not pleasant. Involve your friends, children, or other loved ones in bottling. It's a fun job. One person fills the bottles with the bottling wand that fits onto the bucket's tap (you can use it to fill very accurately).
The other person can provide the bottles with a crown cap and place them in a crate. If you want, a third person can also provide labels to stick onto the bottle. I once made a beer in honor of my daughter who could pee on the potty, 'Sammy's Golden', a Tripel of 8%. I often don't bother to make a label and write what's in the bottles with a glass marker. I also always swap the colors of my crown caps. That way I always know what's in the bottle.
We are done, now just some patience
After filling and labeling, we set the beer in a warm place for another 2 weeks; slightly warmer than room temperature is ideal. I have wide windowsills, so that's handy. After 2 weeks, the carbonation should be complete. Then I place my beer in the cellar for another 4 weeks at +/- 14 degrees. Then your beer is ready to drink. But I admit that I occasionally dive into the cellar to put a beer in the fridge. Purely for quality control purposes :)
Guillaume wasn't born yet, but he already had beer :) . The 120 bottles we brewed in 2 batches were the perfect companion for all the festivities surrounding his birth.
In conclusion
When I started this article / E-book, I didn't know it would become such a hefty piece of reading material. But I like providing information that is as complete as possible, hands-on, and immediately practically useful. That is why I chose to write it from the perspective of my brewing method and my brewing gear. Quite coincidentally :), these are also for sale in my webshop. Obviously, this is commercially interesting for me. But know that the proceeds from the brewing gear make it possible for me to produce even more information about homebrewing, craft brewing, microbrewing, or whatever you want to call it.
If you found this article valuable, definitely consider buying your brewing gear in my webshop; you can use the discount code 'beerstuff' with your first order. You get a 5% checkout discount on your first purchase. As an existing customer, you will more often get discount codes sent to you to use later. Not just new customers, but also existing customers should get an extra treat once in a while :)
I sincerely wish you a lot of satisfaction from those first beers that you, hopefully together with family and friends, knock back.
Cheers, Tom