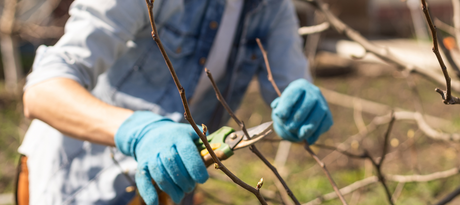
Asparagus is a delicious and versatile vegetable that's easy to grow in the vegetable garden. The most common way to grow asparagus is with asparagus claws, small rhizomes grown at a nursery. You plant these claws in your garden, and the asparagus will then grow from them. Asparagus claws can last 15 to 20 years, so it's an investment to enjoy your home-grown asparagus for years to come. There's a big difference between growing green and white asparagus, which you can read about in the blog post: Green, White, or Purple Asparagus: What Are the Differences? This blog post will teach you step-by-step how to plant asparagus claws in your own vegetable garden.
You plant asparagus claws from March to early May, which is usually the only time you can buy them. Once you receive/purchase the asparagus claws, you need to get started as quickly as possible, otherwise they will dry out quickly.
How do you plant asparagus claws?
Step 1: Choose the right location
Asparagus thrives in a sunny, well-drained location. Choose a spot in your garden that receives at least six hours of direct sunlight and has well-draining soil. Asparagus is generally grown in sandy soil. Asparagus doesn't like wet feet, so make sure the soil doesn't retain too much moisture. If you have clay soil, it's best to create a bed with plenty of sand to ensure successful cultivation.
Step 2: Prepare the soil
Before you start planting asparagus claws, you need to prepare the soil. Dig a trench approximately 30cm deep and approximately 50cm wide to remove weeds, stones, and debris. If you plan to plant multiple rows of asparagus, leave 1.5m between rows. Create a small mound of approximately 15-20cm in the center of the trench along the entire length of the trench, where you can rest the asparagus claws and allow the roots to hang down slightly.

Step 3: Plant the asparagus claws
Place the claws 30-50 cm apart in the furrow and cover them with soil. Make sure the claws are planted upright so the asparagus can grow straight up. Then, mix some compost or organic fertilizer into the soil that emerges from the furrow to increase soil fertility. Carefully tip the soil back into the furrow, ensuring the asparagus spears are buried underground. Be sure to keep them firmly in place.


Step 4: Maintain the asparagus
Once the asparagus spears are planted, you need to care for them well. Water them regularly during their first year of growth, especially during dry spells, and keep the soil weed-free. After a few weeks, the asparagus will begin to grow.
Step 5: Harvest the asparagus
Unfortunately, you can hardly harvest asparagus during the first few years because it isn't strong enough yet. The plant, and especially the root, needs several years to develop. Do n't harvest anything during the first year. In the second year, harvest one asparagus stalk per plant . In the third year, harvest once a week per asparagus plant , and from the fourth year onward, harvest in abundance until the longest day. Harvest green asparagus by cutting it close to the ground. Be careful not to cut the asparagus too low, as this can damage the rhizomes and hinder the plant's growth. Harvest white asparagus with an asparagus picker. This is a job that requires some practice.
How many plants are needed for a weekly meal per person?
For a family of four (2 adults and 2 children), 10 plants are enough for a harvest from late April to June 21st. That's 7 to 8 weeks of fresh asparagus enjoyment!
Let's plant!
Planting asparagus stalks is a simple and rewarding way to grow delicious asparagus in your own garden. It's an investment, as you'll have to wait a few years for the first harvest, but it's definitely worth it. We offer white and green asparagus in our webshop .