
In October, peace returns to the vegetable garden. The potatoes, onions, and garlic are safely stored, the freezer and pantry are well-stocked, and the garden still has winter vegetables like leeks, cabbages, and carrots. Yet, you can do something special at this time of year: sow a vegetable that is harvested in winter. In the Netherlands, we call it witlof (witlof ), in Belgium, chicory —but whether you spell it with or without the "oo," it remains the same white gold.
This special vegetable first grows in the open ground and then in the dark, where it forms its soft white heads.
It takes some patience, but the satisfaction and flavor more than make up for it. This blog post explains step-by-step how to grow chicory, from seed to winter harvest. Enjoy!
Want to start growing chicory with roots? Then go straight to step 4.
What is chicory actually?
Belgian endive (or witloof) belongs to the chicory family ( Cichorium intybus ) and is related to endive. Yet, it's a completely different crop. While endive grows above ground and is harvested for its green leaves, Belgian endive is all about what happens below ground. This is where a thick taproot forms, which will later become the basis for those beautiful white heads.
Chicory is grown in two phases: first you grow strong roots, then you let them grow in the dark into white heads.
In Belgium, chicory is even a national treasure. Its nickname, "white gold," speaks volumes. It's a vegetable with a slightly bitter, refined flavor that works well in both salads and hot dishes. And the best part: you can easily grow it yourself, with a little knowledge and patience.

Step 1: Sowing and soil preparation
Chicory grows best in soil that doesn't contain too much organic matter or nitrogen. So, skip the compost and all-purpose fertilizer! What you do need as fertilizer are two handfuls of potassium fertilizer and a tablespoon of magnesium sulfate per meter. Mix this thoroughly into the soil. Potassium is certainly important when growing chicory. It plays a crucial role in various processes, such as photosynthesis, water regulation, and the absorption of other nutrients. For optimal growth, it's recommended to mix the topsoil with compost to loosen the soil. An airy soil structure is important for good root growth.
Potassium also helps develop strong roots and contributes to the quality and flavor of chicory. A good potassium supply can therefore contribute to better growth and a higher yield.
- Make a sowing furrow in a sunny spot in your vegetable garden with a shovel
- Add a layer of sifted sowing and cutting soil to give your chicory seeds a flying start – this works well, just like with carrots.
- Sow your chicory seeds in spring (early May to early June is ideal) in rows 5 millimeters deep, with row spacings of 30 centimeters. Chicory is usually sown directly in the ground; sowing in the ground ensures strong roots.
- Thin the young plants to a planting distance of 12-15 centimeters (4.7-6.0 in). This may seem like a lot of space, but the difference between strong roots and weak plants is enormous.
- Before sowing chicory, it's important to know that there are different varieties and types of chicory. The choice of variety determines the cultivation method and the final result. Some chicory varieties are better suited to certain growing conditions or uses than others.

Step 2: Store energy in the root, harvest and rest
After 110 to 130 days, your plants will have plenty of green foliage—that's perfectly normal. Use a pitchfork or garden fork to loosen the soil and gently free the roots. Be careful not to damage the roots; all the energy for the next growth phase is stored in them. It's important to even out the long roots if necessary to ensure even growth.
The better you harvest the chicory roots, the more and more often you'll be able to enjoy them later. Healthy chicory roots are essential for a good harvest. Once you've harvested the plants with both roots and leaves, place them on your vegetable garden bed for 14 days to rest. This helps the roots prepare for the next step.
A little something about watering after sowing in your garden
This is where things often go wrong when growing chicory. Water your chicory after sowing, but be careful not to overwater. Even moisture is ideal, especially during the germination period. Make sure the topsoil doesn't dry out, but avoid waterlogged roots. Once the plants are larger, they'll need less frequent watering, especially if the weather isn't too hot or dry.

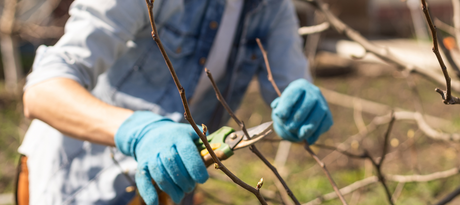
Step 3: Removing the foliage from the roots
At this stage, use a clean, sharp knife to cut the foliage 2 to 4 cm above the root; 3 cm is ideal. This way, the foliage is cut off, leaving the roots ready for the next phase of chicory cultivation. Make sure you cut the roots straight across to ensure you get nice, clean pieces of chicory. Feel free to add the leaves to your compost pile; they're rich in nitrogen and will definitely benefit your compost.
Step 4: Trim the root
The chicory roots can be quite long, but you can cut them back to about 20 cm. These shortened roots are also called chicory tapers and are ideal for planting directly for growing chicory.


1 comment
Dag beste,
Kan je meerdere malen oogsten van de witloof wortelen?
en wat kan je nog doen met de wortels nadien
Grtjs