

Table of contents:
Pickling your own gherkins? With this recipe, you can turn 500 grams of fresh gherkins into delicious, crunchy, sweet-and-sour gherkins using vinegar, sugar, and herbs. We first let the gherkins rest in a salt brine for extra crunch, fill them with a hot sweet-and-sour pickling mixture, and process the jars so you can enjoy your vegetable garden harvest for months to come. Didn't grow any gherkins this year? You can also use snack cucumbers for this!

Tom
It is always a wonderful moment: a home-grown, sweet-and-sour pickled gherkin that gives your dish a real kick. I love it. I also love the look on my daughters' faces, Ella and Sam, when they nibble on a little gherkin with their sandwiches. I make them a bit sweeter for my sweeties, but for myself, I like them to be as if they’re pulling your salivary glands right out of the back of your jaws :) Pickling gherkins is also a delightful activity that the children love to help with. With this recipe, you can easily make the tastiest gherkins yourself. In the vegetable garden, you can harvest all sorts of different vegetables, like cucumbers, courgettes, and gherkins, which you can then pickle or use fresh.
Gherkins are easy to grow. If you have wire or mesh in your garden, they will climb it beautifully. You can choose from various seeds for growing gherkins; the choice of seed partly determines the flavor and size of the gherkins. Gherkins, cucumbers, and courgettes can grow close together, so ensure there is enough space between the plants. Choose multiple plants and pick regularly. Sometimes you can harvest several cucumbers and courgettes in a single day, which you then take home. It is normal to check the plants every day and ensure they get enough water, especially on hot days. I personally prefer the National - Kleine groene variety. They produce small, juicy, and flavorful gherkins that don't grow into those huge ones that you can barely fit into your pickling jars. Always ensure the proper pickling process so that the gherkins remain delicious and crunchy. By the way, pickled gherkins are also delicious in a salad. How do you go about it?
Pickling gherkins: which jars do you need?
For pickling gherkins, use glass preserving jars or mason jars with a well-sealing lid. Clean the jars thoroughly beforehand and check that there are no cracks or damage.
Do you want to store your gherkins for a long time outside the refrigerator? Then it is important that you not only ensure a good vacuum but also sufficient acidity AND correct heating of the filled jars. A lid that pulls a nice vacuum does not automatically mean your gherkins have been safely preserved.
Therefore, use vinegar with at least 5% acetic acid and stick to the ratios provided later in the recipe. Do not just add extra water to make your gherkins less sour.
How to fill, seal, and process the jars? We will go through that step by step below.
Gardener's tip: Write the date on every jar. That way, you'll know next year which jar to finish first. Though we suspect they’ll be long gone by then. 😉
Pickling gherkins yourself: here’s what you need
Fortunately, you don't need much to pickle gherkins yourself. With fresh gherkins from your kitchen garden, a good vinegar, and a handful of seasonings, you're already well on your way.
For this recipe, we use about 500 grams of fresh gherkins. Additionally, you will need vinegar with at least 5% acetic acid, sugar, and salt. You can find the exact quantities and ratios later on when making the pickling brine.
And then comes the best part: the seasonings. Classics like dill, mustard seeds, peppercorns, bay leaves, and garlic always work well. But take a look at what's growing in your vegetable garden. A sprig of tarragon or rosemary, some thyme, or a chili pepper for extra heat: that's how you add your own personal touch to every jar.
Furthermore, you need a saucepan for the pickling brine and glass pickling or mason jars with well-fitting lids.
Everything ready? Then we can get started. First, off to the kitchen garden for the most important ingredient: our gherkins.
Step 1 pickling gherkins: prepare your vegetables
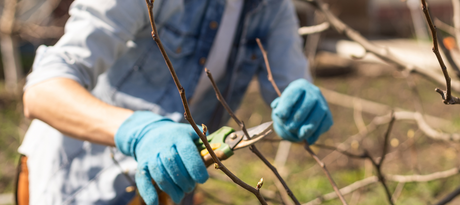
Everything starts in the kitchen garden, of course. Harvest your gherkins regularly so the plant keeps producing new fruits. Use a sharp and clean harvesting shear for this. My little Japanese harvesting companion, the Okatsune 306, is my regular sidekick for this.
Picking tip: I usually remove the first 1 to 3 gherkins from the plant. This allows a young plant to invest more energy into the development of its roots and structure first.
Preferably, harvest your gherkins when they are still small and firm. I find 3 to 5 centimeters to be the ideal size for pickling. If you let them grow too large, the seeds and soft flesh become more prominent, and you lose some of that delicious crunch.
Wash the gherkins thoroughly under cold running water and remove any dirt with your hands or a soft brush.
Want extra crispy gherkins? Then let them rest in a cold salt brine beforehand. Dissolve 50 grams of salt in 1 liter of cold water and soak the gherkins in it. Ensure they stay completely submerged and put them in the refrigerator for 8 to 12 hours.
The next day, drain the brine, rinse the gherkins well under cold water, and let them drain. Feel free to try one; they should already be nice, firm, and crunchy by now.
Picking tip: also slice a very thin piece off the blossom end of each gherkin. That part contains enzymes that can cause your gherkins to become softer during storage.
And then our gherkins are ready for the real work.

rinsing gherkins
Step 2: make your pickling brine
While our gherkins are draining, we'll make the pickling brine. We're going for a delicious sweet and sour gherkin: fresh and acidic, but with enough sweetness to balance everything out perfectly.
For 500 grams of gherkins, use:
- 500 ml natural vinegar with 5% acetic acid
- 250 g granulated sugar
Combine the vinegar and sugar in a saucepan. Heat while stirring until the sugar has completely dissolved, then bring the mixture to a boil.
The base doesn't actually need to be any more complicated than that. We will add the herbs and spices directly to our jars later. Think of mustard seeds, dill, peppercorns, bay leaves, or a clove of garlic. And if you like some heat? Feel free to add a chili pepper.
This way, you can make different jars with the same base recipe and discover your favorite combination afterward.
Picking tip: feel free to experiment with herbs, but do not dilute the vinegar with extra water. Always use vinegar with 5% acetic acid for this recipe. That keeps our sour base at the right level.
Pickling brine ready? Then we can finally start filling those jars.

Step 3 pickling gherkins: prepare and fill your pickling jars
Now for the fun part: filling our jars.
Start with clean preserving or mason jars and check that the jars and lids are not damaged. Wash them thoroughly with hot water and dish soap, or run them through the dishwasher.
First, distribute your flavorings among the jars. For a classic sweet-and-sour pickle, I like to use mustard seeds and fresh dill. This combination provides a fresh, herbal flavor without overpowering our pickles.
As a base, you can count on the following per 500 ml jar:
- 1 teaspoon of mustard seeds
- 1 to 2 sprigs of fresh dill
Want to experiment a little? Feel free to add some peppercorns, a piece of chili pepper, or a clove of garlic. This way, you can easily make a few different types of jars from the same harvest.
Next, arrange the pickles upright and as close together as possible in the jar. You can pack them quite firmly, but try not to force them in.
Pour the hot sweet-and-sour pickling liquid over the pickles until they are completely submerged. Leave about 1.25 cm (½ inch) of headspace at the top.
Gently run a clean, thin spatula along the inside of the jar to remove any air bubbles. Then, check the headspace again and add more hot pickling liquid if necessary.
Clean the rim of the jar thoroughly and close it with the matching lid.
And no, we are not turning our jars upside down now. 😉 In the next step, we will water-bath can them so that we can safely store our pickles later.
Step 4 preserving pickles: water-bath canning your pickles
Our jars are filled and sealed. Because we want to store our pickles for a long time safely outside the refrigerator, we are now going to water-bath can them.
Thanks to the vinegar, our pickles are already in a quite acidic environment. Nevertheless, we choose to also water-bath can the filled jars. This minimizes the chance of yeasts, molds, and other microorganisms, and ensures a reliable seal for our jars.
Place the jars upright in your canning kettle and fill the kettle with water until the tallest jar is at least ¾ submerged. If you are using jars of different heights, it is perfectly fine if the smaller jars are completely underwater.
Ensure that the water in your canning kettle is roughly the same temperature as your filled jars. Our jars are warm due to the hot pickling liquid, so we start with warm water in the canning kettle as well.
Set your canning kettle to 90 °C. Once that temperature is reached, the canning time begins. Can the pickles for 30 minutes at 90 °C.
After 30 minutes, carefully remove the jars from the canning kettle. Do not let them cool in the hot water; instead, place them upright on a folded towel or wooden board and let them cool down gradually.
And with that, the hard work is done. Now we just have to be a little patient before we can pop open our first jar. 😉

Step 5 pickling gherkins: let your gherkins rest
Done with canning? Carefully remove the jars from the canning pot and place them upright on a towel or wooden board. Let them cool down peacefully for 24 hours.
Are you using classic WECK jars with a glass lid, rubber ring, and clips? Simply leave the clips in place while they cool. After about 24 hours, remove the clips and check that the lid is securely attached.
Using canning jars with screw-top lids? Check that the lid has formed a proper vacuum and does not click up and down when you press on it.
Is a jar not properly sealed? Do not store it in the pantry. Put it in the fridge and eat those gherkins first.
Are all jars tightly sealed? Then write the date on them and give them a spot in your pantry. Preferably store your pickled gherkins in a cool, dry, and dark place.
And now for perhaps the hardest part of the entire recipe: waiting. 😅
Preferably give your gherkins a few weeks before you open the first jar. This gives the sweet-and-sour pickling liquid, dill, mustard seeds, and other seasonings plenty of time to infuse the gherkins.
After that? Pop the jar, get a fork, and taste.
Picker's tip: write not only the date but also your herb combination on the label. Especially if you made several different jars. That way, you'll know exactly which combination to repeat next season.
You will be amazed at the satisfaction you get when you taste these delicious gherkins. So much tastier than those you can buy in the store. Plus, something you've made yourself brings so much more joy.
Enjoy!
If you find the information on this site valuable, do consider purchasing your canning supplies from us. Our motto is: what you make or create yourself makes you fundamentally happy.
How long do homemade pickled gherkins keep?
If you have pickled the gherkins according to the recipe, canned them correctly, and the jars have formed a good vacuum, you can store them for up to about 1 year in a cool, dry, and dark place.
Over time, your gherkins may become a bit softer or change color. That's why I think it's a good habit to eat this summer's stock before the next harvest arrives. This way, you immediately make room for new jars. 😉
Opened a jar? Then it moves to the refrigerator. Ensure the gherkins remain submerged in the pickling liquid as much as possible and always use a clean fork to take them out of the jar.
Always check a jar before opening it. Is the lid no longer tight, is the jar leaking, do you see mold, or notice anything else strange? Then it's better not to take any risks and throw the contents away.
Picker's tip: when in doubt, don't rely solely on your nose or taste buds. Never taste a jar if you suspect something is wrong with it.
Frequently asked questions about pickling gherkins
How do you pickle gherkins?
For this recipe, you first let 500 grams of fresh gherkins rest in a cold salt brine for 8 to 12 hours. Afterward, rinse them and distribute them into clean canning jars along with dill, mustard seeds, and any other herbs.
Then, pour a hot sweet-and-sour pickling mixture of 500 ml white vinegar with 5% acetic acid and 250 grams of sugar over the gherkins. Finally, process the filled jars for 30 minutes at 90 °C in the canning pot.
Which vinegar do you use for gherkins?
For this recipe, I use white vinegar with 5% acetic acid. It has a fairly neutral taste, allowing your gherkins and herbs to shine.
Pay close attention to the percentage on the bottle. For this recipe, we use vinegar with 5% acetic acid and do not dilute it with water.
Why do you soak gherkins in salt first?
We mainly do this for the crunch. The salt brine draws some of the moisture out of the gherkins, helping them stay firmer during the pickling and canning process.
For this recipe, we dissolve 50 grams of salt in 1 liter of cold water and let the gherkins rest in that for 8 to 12 hours in the refrigerator. Afterward, we discard the brine, rinse the gherkins, and let them drain well.
How do you keep pickled gherkins nice and crunchy?
Start with young, firm gherkins and preferably harvest them while they are still small. For this recipe, I find 3 to 5 centimeters ideal.
Let them rest in the salt brine and cut a very thin slice off the flower end. It contains enzymes that can cause your gherkins to become softer during storage.
The heating also plays a role. That is why we process our gherkins for 30 minutes at 90 °C and no longer than necessary.
How long do you need to can gherkins?
For this recipe, we process the filled jars for 30 minutes at 90 °C in a canning pot.
Place the jars upright in the pot and fill with water until the tallest jar is at least ¾ submerged. The 30 minutes only begin once the canning pot has reached 90 °C.
Do you have to can gherkins?
Because of the white vinegar with 5% acetic acid, our gherkins are already in a fairly acidic environment. However, we consciously choose to can the filled jars in this recipe as well.
This is because we want to be able to store our gherkins safely outside the refrigerator for a long time. By canning them, we give yeasts, molds, and other microorganisms as little chance as possible and achieve a reliable seal on our jars.
How long do homemade pickled gherkins need to infuse?
This is where your patience will be tested. 😉 Give the gherkins a few weeks before you open the first jar.
This gives the vinegar, sugar, and herbs plenty of time to infuse the gherkins and balances the flavor nicely.
Can you pickle gherkins without sugar?
In this recipe, sugar primarily provides that typical sweet-and-sour taste and balances the sharpness of the vinegar.
If you want gherkins without sugar or with significantly less sugar, I would use a recipe specifically formulated without sugar, rather than just adjusting the ratios of this recipe.
Which herbs go well with pickled gherkins?
With dill and mustard seeds, you are always safe. That is also my favorite base for a classic sweet-and-sour gherkin.
But feel free to experiment here. Think of peppercorns, garlic, bay leaf, tarragon, or a piece of chili pepper for some extra heat. Feel free to make several jars with different herbs. That way, you'll immediately know which combination was your favorite at the next harvest.
How long do homemade pickled gherkins keep?
If the gherkins have been pickled and canned according to the recipe and the jar is tightly sealed? Then you can keep them for about 1 year in a cool, dry, and dark place.
Once opened, store the jar in the refrigerator. Make sure the pickles remain submerged in the brine as much as possible and always use a clean fork to fish one out.
Do you see mold, is the jar leaking, has the vacuum seal been broken, or do you not trust the contents for any other reason? Do not taste them, but discard the contents.




1 comment
Hallo, ik vroeg me af waarom augurken geweckt worden op 90°C en niet op 100 zoals de meeste andere groenten en vlees