Free shipping in the Netherlands & Belgium from €75*

How to make your own white wine or rosé - Step by step

Witte wijn maken

Table of Contents:

Introduction to Making White Wine or Rosé Step 1: Harvesting Your Grapes Harvesting healthy grapes is crucial What you need to make white wine per phase Phase 1 Wine Making: Cleaning your equipment and General matters Phase 2: Harvesting your grapes Phase 3 Wine Making: Destemming and crushing Phase 4: Must treatment: Phase 5: Pressing the must into juice Phase 6: Pre-clarification of the juice Phase 7: Transferring the juice to the fermentation tank Phase 8: Measuring your juice and making any adjustments Phase 9: Starting the fermentation Phase 10: Racking and starting or avoiding malolactic fermentation Phase 11: Aging the wine and cold stabilization Phase 12: Bottling Making white wine - not the same as making red wine Step 1: Cleaning and disinfecting all equipment - before harvest Step 2: Harvesting your wine grapes Harvesting grapes and rain Harvesting grapes and temperature Cool grapes: preserves fruitier aromas and improves control Checking your harvest for bad berries, leaves or twigs and insects Give good instructions to your helpers Harvest in low, stackable and clean peat crates Store grapes in the refrigerator Weighing your harvest of wine grapes or even counting bunches Step 3: Crushing and destemming your bunches (as soon as possible after harvest 10-20°C) My struggles in 2018 and 2019 Add potassium metabisulfite to the receiving vessel of your must Making white wine - Crushing and destemming Stage 4: Must treatment (optional) Applying a cold maceration to your must - 4 reasons First reason: Color extraction Third reason: softer tannins

Introduction to making white wine or rosé

Hi there. Thank you for consulting this article, which should help you step-by-step with making delicious white wine or rosé. Rosé is actually made like white wine. That's why I'm covering making white wine and making rosé in the same article.


I'm going to break this article about making white wine into 10 steps, from harvest (1) to bottling (10). I can't wait to help you get started on your winemaking adventure.


In a previous general article about winemaking, I offered some very important general tips. If you haven't already, I definitely recommend reading the article below first.

Making wine from grapes Making your own wine from grapes is divine!

In the article you're reading here, I'll be referring to specific topics because they often apply to different wine styles. For example, if I discuss the ripeness index, I'll refer to a separate article. If a topic is different for making white wine than for red wine or fortified wine, for example, I'll include it in this article. In any case, it should be clear.


And now… “Making wine!”

Step 1: Harvesting your grapes

It may sound strange, but in step 1, the hardest part is already done: growing healthy grapes with the right characteristics for the wine style you want to make.

Harvesting healthy grapes is crucial

What do you need to make white wine per phase

To make it easy for you, I've compiled a list below for each phase of vinification. You can use it as your checklist.

Phase 1 Winemaking: Cleaning Your Equipment and General Matters

  • For cleaning: Use a neutral soap to clean everything that comes into contact with your grapes, must, juice, or wine. You can loosen any caked-on bits with Puro oxi .
  • Disinfectants to disinfect anything that comes into contact with your grapes, must, juice or wine
  • A good vinification schedule that guides you step by step.
  • Writing materials
  • Coffee spoon
  • Jars for precision scales or pH meters

Phase 2: Harvesting your grapes

Phase 3 Winemaking: Destemming and Crushing

Phase 4: Must treatment:

Phase 5: Pressing the must into juice

Phase 6: Pre-clarification of the juice

Step 7: Transferring juice to fermentation vessel

Phase 8: Measuring your juice and making adjustments if necessary

Phase 9: Starting the fermentation

  • Measuring cups 100 , 250 ml or 1 liter
    • For yeast starter (size = volume of juice divided by 100, e.g.: 20 liters of wine, measuring cup +/- 200 ml)
    • For yeast nutrition (size = same as for yeast starter)
  • A wine thermometer
  • Water at 30-35 degrees
  • Wine yeast
  • Yeast activator for yeast starter Vitadrive F3
  • Yeast nutrition Vitaferm F3
  • Cane sugar (optional to adjust potential alcohol)
  • Tea or dish towel
  • A freezer or refrigerator with an external thermostat (optional)

Phase 10: Transfer and initiate or avoid malolactic fermentation

Phase 11: Wine maturation and cold stabilization

Phase 12: Bottling


With red wine we add yeast to the must, with white wine we first press the must and do the fermentation afterwards

Making white wine - not the same as making red wine

Step 1: Clean and disinfect all equipment – ​​before harvesting

As your harvest date approaches, it's best to ensure all your equipment is clean and disinfected. From pruning shears to airlocks, I personally leave nothing to chance. Even after I've used something, I always rinse it before putting it away for next time. Residue from peels, juice, or seeds can contaminate your equipment, and we naturally want to work as cleanly as possible. There's a difference between cleaning and disinfecting. By cleaning, I mean removing any dust or residue from previous treatments. Definitely avoid perfumed or highly concentrated products. A neutral hand soap is ideal. Dish soap is usually quite harsh; you don't want a soapy smell in your wine.

Making white wine - clean everything that comes into contact with your must, juice, or wine. Disinfecting means removing all unwanted organisms from your winemaking equipment. Once your equipment is clean, you can immerse it again in a bath or bucket of water containing water, potassium metabisulfite , and citric acid. Use 20 grams of potassium metabisulfite and 5 grams of citric acid per 5 liters. 5 liters is usually enough to submerge everything and clean it hygienically. You can also use ready-made Puro oxi. After cleaning large equipment such as a destemming crusher or a stainless steel fermentation tank, I spray it with a spray bottle containing a solution of 2% hydrogen peroxide in water. The more the equipment or tools come into contact with your grapes, must, or wine, the more thoroughly everything needs to be disinfected. I clean the Veenmans crates in which I harvest with a strong jet of water and do not disinfect them. For example, I thoroughly clean and disinfect my pipette , which I use to dip into my juice during my measurements. The day or week before you start, go through the list at the beginning of this article and clean and disinfect everything you need in advance.

Step 2: Harvesting your wine grapes

Harvesting grapes and rain

Ideally, harvest your grapes at least 24 hours after the last rain shower. Grapes soak up water during rain. I once performed a test and measured my Johanitter grapes at 61 Oechsele, or 7.8 degrees alcohol, before a rain shower. After a night of rain showers, I took further measurements, and my refractometer measured 7 Oechsele less, or 0.7 degrees of potential alcohol lost. After two beautiful sunny days, I measured 63 Oechsele. You see, rain can make all the difference. Sometimes a rainy spell in September/October is hopeless, and mold pressure is high, leaving you with difficult choices. But if at all possible, wait 24 hours after the last rainfall; 48 hours is even better.

Grape harvesting and temperature

Cool grapes: fruitier aromas are preserved and better control

Cold fruit will give us more control during the winemaking process. In the mornings of September or October, the grapes are around 6-10 degrees Celsius, depending on nighttime temperatures. This is better than grapes that have been hanging in the sun for a while, for example, at 22°C. At warmer temperatures, the fruit oxidizes more quickly, and acids and fruity aromas escape. Especially with early varieties like Siegerrebe and Solaris , which we sometimes harvest as early as August, we need to be early.

Check your harvest for bad berries, leaves or twigs and insects

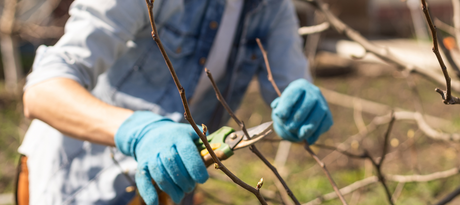
Both in the vineyard and later in your winery, it's best to ensure you have beautiful bunches with as many intact berries as possible. It's possible that some bunches are affected by botrytis, bird damage, sunburn, etc. It's best to remove the affected grapes or the affected parts of the bunch. The healthier the fruit, the fewer problems you'll have during winemaking. However, as a winemaker, we can prune away the bad grapes (botrytis, downy mildew, powdery mildew, Drosophila suzukii, wasp damage, sunburn, etc.). Be sure to take your time. Try to select only intact fruit, especially if you want to make wine as naturally as possible. After a thorough inspection of the vineyard, it's best to also check your winery for any leaves or twigs. We don't want those in our wine. Dense bunches, like those of my Johanitter, for example, also harbor many ladybugs. While crushing and destemming I always have a glass jar at hand with some twigs in it to save the ladybirds from the wine press .

Harvesting my third-year Regent vines for rosé

Give good instructions to your helpers

If you've enlisted help to harvest your grapes, give your pickers proper instructions about the harvest. Tell them about the selection you want and show them some examples of what you do and don't want in your harvest bins. If you have vines that aren't ready for harvest yet, inform your pickers. You can't hang back pruned bunches :) Provide them with clean, disinfected, and well-maintained equipment. Provide food and drinks, create a pleasant atmosphere, and keep an eye on everyone to ensure they're working efficiently.

Harvest in low, stackable and clean peat crates

In principle, you can also place your bunches in a plastic bag or bucket after harvesting. Personally, I'm a big fan of Veenmans crates, which are specially designed for harvesting. The low-lying crates can hold 10 kilos of grapes. Stacking the crates also prevents the grapes from being crushed. If you still have to drive to your winery, the stacked crates will remain nicely upright. You can also quickly weigh them on a scale; one Veenmans crate weighs 835 grams. This makes it easy to determine your net harvest weight.

Storing grapes in the refrigerator

As amateur winemakers, we often have children, work, other hobbies, and so on that require our attention. Because of this, we can't always pick in the morning to achieve the right temperature. Or we can pick in the morning, but we can't crush and destem. Once your grapes are harvested, you can easily store them for a day or two in the refrigerator at 6°C without losing their potency. I use an old chest freezer, a suitcase model. I use an external thermostat that connects the freezer's plug to the wall socket. A sensor is attached to the external thermostat, which I place inside the freezer. This ensures that the freezer only works when the temperature rises above a set point (for example, 8 degrees). The thermostat also cuts off the power to the freezer when the temperature falls below a certain point (for example, 6 degrees). This way, I can always control my temperature. I can easily cool 50 to 100 kilos of grapes in my chest freezer.

Weigh your harvest of wine grapes or even count bunches

There are winegrowers who go much further before weighing the weight of the grape harvest. They also count the number of bunches, by variety, and by row. This allows them to map the yield per grape variety or per row of grapes. This gives them insight into the vineyard's productivity over the years. I wouldn't go quite that far.

Making wine - you know the harvested bunches. Then you can also calculate the juice yield . This display on my scale shows 9.070 kg; I still need to subtract 830 grams from the Veenmanskist. You can, of course, reset the scale to 0.000 with an empty Veenmanskist. I didn't have any empty ones left; everything was full :) I weigh my grapes immediately when they arrive at my urban winery, also known as the garden. I measure the weight per variety or possibly per wine if I combine multiple grapes at the start of the winemaking process. I find the weight useful for comparing with the must (the crushed and destemmed grapes). Years with a lot of budding will result in a lower must-to-bunch weight ratio because the stems then weigh proportionally more than the berries. In 2020, for example, I had 32 kilos of Johanitter grapes from 17 vines. I extracted 26.5 liters of must from them. This data may be interesting to compare with the 2021 harvest.

Step 3: Bruise and destem your bunches (as soon as possible after harvest 10-20°C)

The logo already gives it away. Whether making white wine, rosé, or red wine, we destem and crush the berries. There are a few exceptions that require a separate article. In this article, we'll cover destemming and crushing for convenience. Exceptions include:


  • Carbonic maceration
  • Pressing in full bunches is often used for sparkling wine.

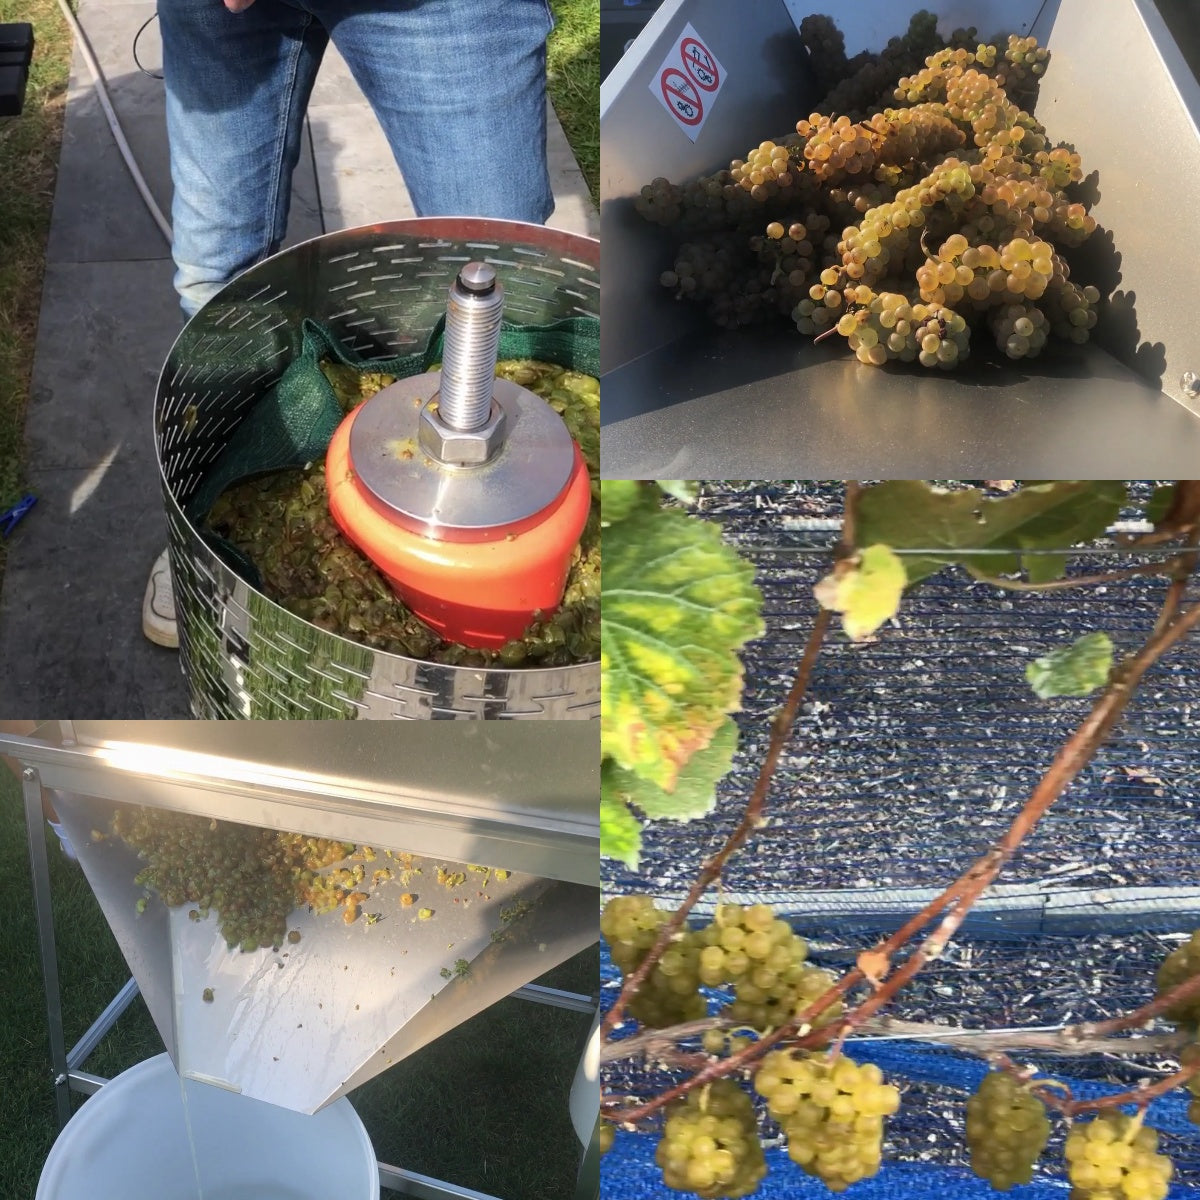
The easiest option is a destalker that removes the berries from the stems and crushes the grapes. If you have a small number of vines and are brave enough to remove all the berries from the stems with your hands or a fork, you can do that too. But if you have 10 vines (easily 160 bunches) or more, definitely consider investing in a destalker. Trust me, your desire to make wine will quickly fade after spending a few hours struggling to destalk and crush your grapes. And if you can spare a few vines, choose a stainless steel destalker. A painted one will always rust a bit if the paint is damaged or if it rubs along the seams.

My struggles in 2018 and 2019

In my first year, 2018, I worked with a hard sieve that I could place on a bucket. I had 20 kilos of grapes, and at dusk, I pushed them through the screen by hand, crushing, destemming, and pressing all at once. It was pitch black when I finished, and my hands were bright red (from the friction, not from the grapes, which were white Johanniter grapes) and were incredibly painful. The following year, 2019, I inherited an electric motor-driven crusher from Joseph (who had since passed away) with two rotating cylinders with a rough surface. These cylinders were spaced 0.5 cm apart, and I could throw my bunches through them. But then I had a bucket full of must, but with the stems still clinging to the stems. It was another hassle to pick out those stems and shake off the last few grapes. In 2020, I invested in a de-stalker with a sliding surface , and I have to say: "A world of difference." It's motorless, but it's very easy to operate. The stems come out the side of the device, and the must comes out the bottom. Here's a video:

Add potassium metabisulfite to the receiving vessel of your must

To neutralize any wild yeasts and bacteria present in the must, we add a small dose of potassium metabisulfite to the must treatment vat where the crushed grapes are placed. We do this before we start crushing. You can assume you'll have 90% of the weight of your grapes in must. 100 liters of wine yields 90 liters of must. Practically speaking: add 0.5 grams of potassium metabisulfite (KDS) per 10 liters of must to the receiving vat. Note that this is only half, or +/- 0.25 grams per 10 liters of sulfite, since potassium metabisulfite also contains potassium molecules. I always list the amounts in grams of potassium metabisulfite or KDS per 10 liters; some websites list them differently. If you expect 90 liters of must, add 4.5 grams of potassium metabisulfite to your receiving vat. Or divide that amount if you have several smaller vats.

Making white wine - Crushing and destemming

If your grapes are too heavy to move after destemming and crushing, it's best to place a temporary bucket under your crusher/destalker. This way, you don't have to lug barrels weighing tens of kilos. I collect the crushed grapes in a 30-liter plastic fermentation bucket, which I regularly pour into a must treatment vessel. This contains the 0.5 grams per 10 liters of potassium metabisulfite. Your wine is now temporarily protected; the sulfur will bind with the oxygen in the wine, preventing oxidation. It will also silence some wild yeasts and (acetic acid) bacteria.

Phase 4: Must treatment (optional)

Here you have a choice to make. Do I do a must treatment or not? I'll tell you later what factors will influence your choices. The question is: "Do I do something with the destemmed and crushed grapes, or do I move straight on to the next steps?" This is also the final step, which applies to white, red, and rosé wine. After this, the paths diverge. White and rosé wine will be pressed after the (optional) must treatment, while red wine will ferment in contact with the skins. Now that your grapes are neatly separated from the stems and your berries are also crushed, you have must. The skins and seeds are still in your juice, and now is the time to treat your must if you wish. Thanks to the sulfites from the previous step, your wine is now protected from oxidation. It's best to place a (floating) lid on your receiving vessel during the must treatment to prevent flies and ensure a constant supply of oxygen. Possible treatments include:

Applying a cold maceration to your must - 4 reasons

After destemming and crushing, you can chill your must for another 24 hours to 7 days. This is called cold maceration. A prerequisite for cold maceration is healthy fruit. With a poor harvest, it's best to skip this step. Besides the beneficial components in the skins, poor or damaged harvests contain too many harmful components in your must. With good fruit, the following factors can be a reason to definitely do a cold maceration. Cold maceration is done at 2 to 6 degrees Celsius. This prevents spontaneous yeasts and bacteria from attacking your must.

First reason: Color extraction

A cold maceration draws color from the skins of your wine. If you want to make red wine or orange wine, it makes sense to use a cold maceration. Anthocyanins, which give your wine color, are more soluble in the must at colder temperatures. Tannins are extracted during alcoholic fermentation. So, if you want a lot of color in your wine but no tannins, choose a longer cold maceration and a faster alcoholic fermentation.

winemaking - destemmed and crushed grapes can be given a cold maceration or treatment for juice yield Second reason: Flavor and aroma components Just like color, cold maceration also brings out the flavor and aroma in your wine without the harsh tannins. The flavor and aroma components from cold maceration enhance fruitiness and add complexity to your wine.

Third reason: softer tannins

During a cold maceration, tannins are indeed extracted from the grape skins, but care must be taken

About the blogger

My name is Tom and I am co-owner of Plukkers.com. I am the father of two beautiful daughters and I have a wonderful wife. When I turned a bare spot in the lawn into a herb garden in 2014, I got a very special feeling inside. I immediately felt that it was not a whim but the start of an irresistible and fiery passion. I wanted to know everything and also wrote down what I learned on my website Moestuinweetjes, which is now called Plukkers.com. I also want to inspire other people to grow their own food. At my house in Wielsbeke is my dream garden with a greenhouse, vegetable garden and a hobby vineyard with 333 vines. In addition to wine, I also make delicious beer at home to occasionally celebrate life in moderation. I toast with you to an exciting, richly filled life under the motto: "Make it yourself!"

1 comment

Hallo Tom,
Ik vind je blog over wijn geweldig. Samen met vijf vrienden bezitten we een kleine wijngaard met 600 wijnstokken in Henegouwen en we willen dit jaar voor het eerst wijn produceren. Dat is spannend, maar er komt ook veel bij kijken, zoals de apparatuur en het wijnbereidingsproces. Het is waar dat het voor amateurwijnmakers zoals wij niet eenvoudig is om de juiste informatie op internet te vinden. Uw blog is perfect voor ons en zal ons zeker helpen. Wat betreft het artikel “Hoe maak je je eigen witte of rosé wijn – stap voor stap”, het stopt bij stap 4 en ik kan de uitleg van de volgende stappen niet vinden. Is dit normaal of heb ik niet goed gezocht? Bedankt voor uw antwoord en veel succes.

Nicolas Parmentier,

Leave a comment