
Table of contents:
Introduction
Dahlias are truly the cozy eye-catchers your garden has been waiting for! You can find them in all sorts of fun types and sizes – from small, cheerful little balls to those impressive large flowers. People who visit us at home often can't believe their eyes. The great thing about dahlias is that there is simply always one that perfectly suits you. Are you more into soft pastel tones, or do you prefer those wonderfully striking colors that you can see from afar? With dahlias, you can go in any direction, and that is exactly why we like them so much. In this article, I will take you on a dahlia journey through everything you need to know to plant and care for these beautiful flowers yourself. I'll give you handy tips on watering, choosing the right types, and how to make your dahlias truly shine in your garden. Before you know it, you'll have created your own floral paradise – and believe me, that feels really good!
First, a few important 'secrets' about planting dahlia tubers
Plant dahlia tubers after the last night frost, usually from mid-May to early June
Dahlias need a sunny spot and nutritious, well-draining soil for optimal growth
Plant tubers 5-8 cm deep with 40-50 cm spacing between them
You can pre-sprout dahlia tubers in 2-liter pots starting in March. This leads to earlier blooming and stronger plants.
It is best to support dahlias with a support net that you slide over plant stakes
Dahlias are not hardy and must be dug up in the autumn. It is wise to prune the dahlia stems to 15 cm before digging up the tubers. Let the dahlia tubers dry for a few days after digging them up to prevent mold.
Types of dahlias: colors, shapes, and heights
Dahlias – you probably know them, those beautiful flowers that really bring your garden to life! The fun thing is that there are so many different types that you are guaranteed to find a dahlia that suits you perfectly. Are you a fan of soft, calming colors? Or are you going for those bright pink specimens that will make your neighbors jealous? And then there are those stunning, almost black dahlias – truly special! With more than 40 different species and tens of thousands of cultivated varieties, you can go in any direction. Did you know, by the way, that the dahlia originally comes from Mexico and is even their national flower?
In terms of colors, you can go wild: white, yellow, orange, red, purple, pink, and even fun two-tone variants. Dahlias are available in both soft pastel tones and bright colors, meaning there is something for every taste. Although dahlias are available in a wide range of colors, you won't come across blue ones.
And then there are the shapes – really, they are all different! You have those cute single-flowered dahlias with their open hearts, but also those beautiful pom-pom shaped ones that look like someone sat there and crafted them. Pom-pom dahlias have spherical, compact flowers with many petals. The cactus and ball-shaped varieties are real eye-catchers in your border. Cactus dahlias have long, narrow, richly branched petals that give a spiky appearance. Some stay nice and compact (perfect for your balcony or in a pot), while other dahlias just keep growing up to one and a half meters high – ideal if you want a real eye-catcher at the back of the border. Dinnerplate dahlias are known for their large, impressive flowers that are a real showstopper in the garden.
It is useful to take a moment to think about what best fits your space. Don't have much room? Go for a compact variety – they do just fine! Want that lush, colorful garden that everyone stares at? Then mix and match different types and heights for a playful, cheerful effect. The beauty is that you can try new dahlias every year and keep redesigning your garden. Have fun choosing!
When to plant dahlias
The planting time for dahlias is crucial for success. Dahlias are not hardy and cannot tolerate frost, so timing is everything. The answer to the question of when you should plant dahlias depends on your region and the weather.
Optimal planting time for dahlia tubers:
- Mid-May to early June: after the last night frost, when the soil is warm enough
- Soil temperature: at least 15°C for proper root development
- Frost-free: wait until you are sure there will be no more night frost. Sometimes it is wise to wait an extra week just to be sure that the conditions are safe for your dahlias. It is best to plant only when the chance of night frost has completely passed.
- Moisture: the soil around dahlias must not dry out, as this can hinder growth. Mulch is a must in a modern vegetable garden, so apply a layer to your dahlia bed as well.
Starting indoors:
- March to April: start by pre-growing in pots indoors in a 2-liter pot. My advice for soil: 40% potting soil and 40% sowing and cutting soil and 20% perlite.
- Advantage: you get flowers earlier and stronger plants
- Planting out: after the Ice Saints (mid-May) you can plant out the pre-grown dahlias
Pay attention to the weather in your region. In the north of the Netherlands, it is better to wait until the end of May, while in the south you can sometimes start as early as the beginning of May. I always check the weather forecast for the next two weeks before I put my dahlias in the ground. Regularly checking the temperature and conditions helps to determine the right moment for planting and minimizes the risk of damage from cold.
Preparing dahlia tubers
Before you plant your dahlias, it is important to check your dahlia tubers properly. Healthy tubers are the basis for strong, flowering plants.
Check your dahlia tubers for:
- Firmness: the tuber should feel firm, not soft or spongy
- Eyes: look for small buds or shoots that indicate where new growth will sprout
- Mold: no white or gray spots that indicate rot
- Damage: small blemishes are okay, large cracks are not
- Check the tubers regularly for drying out.
Store your tubers in a cool, dry place until it is time to plant. A cardboard box in the garage or shed works fine. Make sure they do not dry out, but also do not become damp. Check the tubers regularly for mold or rot so that you can prevent problems in time. Preferably store them in a dark, cool, and draft-free place. Use a cardboard box or plastic crate to store dahlia tubers. You can store the tubers in crates or boxes between newspaper to protect them extra well. Dahlia tubers can also remain in the ground, but that carries the risk of freezing.
If you notice that your tubers are already sprouting during storage, don't worry. You can simply plant them carefully in pots and let them grow indoors until it is warm enough to go outside. Damaged or diseased tubers should not be put back into the soil but should be removed immediately.
After checking and storing the tubers, you are ready to start planting dahlia tubers.
Pre-sprouting dahlias in pots
Pre-sprouting dahlias is actually my favorite way to get started. It gives you such a head start and the plants become stronger. Furthermore, pre-sprouting works in both pots and in open ground, which makes you flexible in your approach. Plus, you can start as early as March if you have itchy green fingers!
Step-by-step pre-sprouting:
Timing: start indoors from March to mid-April
Choosing a pot: use a pot of about 2 liters and 16-18 cm in diameter.
Potting soil: fill with 40% vegetable garden potting soil, 40% seed and cutting compost, and 20% perlite.
Planting: place the tuber carefully with the eyes facing up
Depth: just cover the tuber with a thin layer of soil
Location: place in a light, warm spot (15-21°C)
Care during pre-sprouting:
- Water as soon as the soil feels dry
- Water using a Danish tray (base) so the soil can absorb water from below.
- Do not keep them too wet - dahlias do not like wet feet
- The first shoots usually appear after 2-3 weeks. During pre-sprouting, you can also take cuttings from these young shoots to easily propagate your dahlias.
- Move the pot outside as soon as there is no more night frost
The beauty of pre-sprouting is that you can observe your dahlias as they develop. You see exactly how they grow and can protect them from unexpected weather conditions.
Location and soil preparation
A good start begins with the right location and soil. Dahlias aren't difficult, but they do have their preferences. You can recognize a healthy dahlia by its fresh green leaves, which indicates a vital plant.
The perfect spot for dahlias:
- Full sun: at least 5-7 hours of direct sunlight per day
- Sheltered spot: out of the wind, especially for large dahlias that grow tall
- Watering: a spot where you can easily reach them to water or consider installing an irrigation system.
- Space: enough room so that dahlias are not planted too close together
Soil preparation: dahlias love nutritious, humus-rich soil that drains well. Heavy clay soil where water stays standing is a disaster - your tuber will rot before you know it. Good soil preparation is important for dahlias in both pots and in the open ground. Improve clay or sandy soil with compost or leaf mold for dahlias.
Improve your soil with:
- Work compost or aged manure into the soil
- Add sand to heavy soil for better drainage
- Do your soil preparation in the final winter months.
- A pH between 6.0 and 7.0 is ideal
- Dahlias can do fine without extra nutrition, as long as the soil contains enough nutrients.
I always dig plenty of compost into the spot where my dahlias will be planted. It’s a bit of work, but your dahlias will thank you with beautiful flowers.

Tom Deseyn
In February, I prepare all my vegetable garden beds. This gives me plenty of time starting in March to, among other things, pre-sprout my dahlias. Nothing is more fun than being able to plant throughout the year without a second thought.
Planting dahlias step by step
Planting in open ground
Now comes the fun part - you are actually going to get started with planting dahlia tubers! The instructions below apply to both planting in pots and in open ground. I will guide you through the entire process.
Supplies:
- Spade or shovel
- Garden gloves
- Compost
- Mulch
- Water
- Optional plant stakes and a support net
- Make sure to plant only one dahlia tuber per pot, as the plant needs 30-60 cm of space.
The planting process:
Dig a hole: make a hole twice as wide as your tuber
Depth: 5-8 centimeters deep - not too deep!
Add compost: put a scoop of compost in the bottom of the hole
Place tuber: place the tuber carefully with the eyes facing up
Cover: cover with soil and press down lightly
Water: water thoroughly immediately after planting
Spacing between plants:
- Small dahlia varieties: 40 centimeters apart
- Medium varieties: 50 centimeters
- Large dahlias: up to 80 centimeters spacing
Tips for planting in the ground:
- Do not plant too early - wait until the soil is warm
- Mulch around the plants to retain moisture
- Immediately install plant supports for varieties that grow tall
- Mark the spot so you know where your dahlias are located
Tom Deseyn
When planting dahlias in the open ground, you have more space, but also a higher risk of problems with slugs and other pests. Miscanthus bedding is a mulch that slugs do not like because the sharp edges don't feel very pleasant to them.
Planting in pots and containers
Dahlias in pots are perfect for balconies or if you want to remain flexible with your garden layout. Dahlias are excellent for growing in pots or containers, making them ideal for people with limited space or who like to vary their garden arrangement.
Pot requirements:
- Minimum size: 30-43 liter pot per dahlia for large plants
- Drainage: holes in the bottom for excess water drainage
- Stability: large pot for large dahlias to prevent blowing over
- For smaller dahlia varieties, pots of at least 30 liters are recommended. A larger pot or container provides more space and nutrients for the dahlias, resulting in healthier and stronger plants. Dahlias must be kept in well-draining pots or containers to prevent root rot.
Potting soil and planting method:
Drainage layer of 3 to 5 cm of hydro granules at the bottom of the pot
Fill with universal potting soil mixed with some compost
Plant the tuber at the same depth as in the ground, 5 to 8 cm deep
Ensure sufficient water - pots dry out faster
Top off the pot with mulch. Miscanthus bedding is ideal.
Dahlias in pots need a bit more care, but you can protect and move them more easily if necessary. It is important to fertilize dahlias regularly, especially in pots, to ensure healthy growth and flowering. You can use regular liquid tomato fertilizer, which contains all the nutrients your dahlias need. Don't forget that dahlias need plenty of water, especially when they are in pots, as pots dry out faster.
You can also sow dahlias yourself
Besides planting tubers, you can also grow dahlias from seed. This is a fun way to discover new types of dahlias and is actually not as difficult as people often think. Single-flowered dahlias have an open bloom that makes nectar available to insects, which makes them extra attractive to pollinators.
Sowing process step by step:
- Start on time: sow indoors from the end of February to mid-April
- Use seed compost: fill seed trays or P7 pots with light 3/4 seed and cutting compost and 1/4 perlite.
- Sow superficially: place the dahlia seeds on the moist soil and press them down lightly. Do not cover them with soil; dahlias are light-germinating
- Moisten carefully: use a plant spray to make the soil lightly moist without shifting the seeds
- Create a warm, light environment: place the seed tray in a light spot at ± 20–22 °C. A propagator or windowsill above a radiator works well.
- Cover if necessary: cover with clear plastic or a lid/growing dome to retain moisture. Remove this as soon as the seedlings appear (after ± 7–14 days)
- Care for seedlings: water regularly, but prevent the soil from remaining wet. Ensure sufficient light to prevent leggy growth. Use grow lights if there is not enough light. They guarantee sufficient light.
- Pricking out: when the plants have 2–3 leaves, move them to larger P11 pots with potting soil for vegetables and herbs.
- Hardening off: place the plants outside during the day in a sheltered spot from late April to get used to outdoor conditions
- Planting out: after the Ice Saints (mid-May), plant the young dahlias in the ground or in pots in a sunny spot
Sowing dahlias gives you the chance to find types of dahlias that you might otherwise never encounter. By sowing, you sometimes find unique dahlias that you won't easily find in a garden center. Moreover, it is very satisfying to see your dahlias develop right from the start.
Initial care after planting
The first weeks after planting are crucial. Your dahlias need to root and get used to their new spot.
Watering:
- Immediately after planting: water well to let the soil settle
- First week: check daily, especially in dry weather; less important if using mulch.
- Afterwards: water when the soil feels dry
- Note: do not overwater - dahlias love moisture, but not wet soil
- On hot summer days, it is recommended to water dahlias more regularly, adhering to the motto 'better a lot at once than a little every day'. Apply potassium-rich fertilizer during the growing season for more flowering of dahlias.
Protection:
- Slugs: the biggest enemy of young dahlias! Use slug pellets or other protection
- Sheltered spot: protect against strong wind for the first few weeks
- Frost: in case of unexpected night frost, cover with horticultural fleece
- In case of infestation by diseases or pests, you can apply a suitable agent to keep your dahlias healthy.
Care and maintenance during the season
Do you want your dahlias to shine all season long like true garden queens? It just starts with the basics: make sure the soil stays nice and moist, especially if the weather is so hot and dry that you yourself are looking for shade. Your dahlias are just like us – they love plenty of water, but are not happy with 'wet feet'. The secret? Give them a good drink once or twice a week, so it can sink deep down to the roots. Just grab the garden hose and take your time.
Besides that daily care, your dahlias also love a tasty snack.
First fertilization: after 2-3 weeks you can start with liquid plant food. Apply liquid fertilizer every two weeks during the growing season for optimal flowering.
But do watch out for those annoying slugs – they find the young green of dahlias just as delicious as we find a fresh salad. I always check my plants during my morning coffee, and if there are too many slugs crawling around, I just grab a suitable remedy. With these simple care routines, you will keep your dahlias happy and enjoy their beautiful show in the garden for months! As mentioned earlier, mulching with miscanthus or hemp fiber also helps against slugs. They don't like those sharp edges.
Pinching dahlias for more flowers
Pinching dahlias is a technique people sometimes forget, but it really makes a difference to the number of flowers you get.
When to pinch:
- Plant height: 30-50 centimeters tall
- Number of leaf pairs: 3-4 pairs from the ground
- Timing: a dry day, so the wound can heal properly
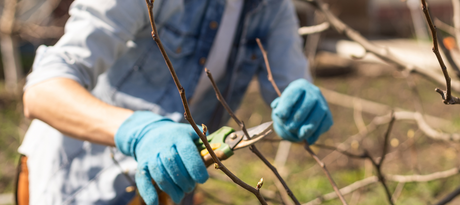
- Prune the tips of the young dahlias to get a more compact and fuller-looking plant.
- Plant height: 30-50 centimeters tall
- Number of leaf pairs: 3-4 pairs from the ground
- Timing: a dry day, so the wound can heal properly
How to pinch:
Find the top of the main stem
Cut or snap it off just above a pair of leaves
Let the plant bloom from the side shoots
Result: a more branched plant with more flowers
Not all dahlias need pinching. Single-flowered dahlias and shorter varieties often grow beautifully branched on their own. Large dahlias and taller varieties usually benefit from it.
Benefits of pinching:
- More flowers per plant
- Sturdier, more compact plant
- Less chance of blowing over
- Longer flowering period
Supporting dahlias with a support net and stakes
The goal of your dahlias is often to put together beautiful bouquets or create a lovely display of seemingly endless flowers. A major spoiler here can be the weather conditions. Especially heavy thunderstorms accompanied by wind can simply lay your plants flat. That is why we are going to support the dahlias with two aids.

Supporting plants is done for many varieties with a stake or rack placed close to the plant. For dahlias and many other cut flowers, we let the flower stems grow through a support net or support mesh. On one hand, we place a rod in the ground every meter. I use the Crapal rebar rods, which are incredibly strong, and if they rust a bit, it doesn't even look bad—it has a rustic quality. Over the plant rods, we stretch a support net, which we also use to let peas, sweet peas, or cucumbers climb. If your beds are 1 meter wide, the 1-meter-wide support net is also ideal.
Keep pinching dahlia plants and removing spent dahlias
Those first dahlia plants popping their heads up in June and July are a real treat! Depending on which variety you have chosen, you can enjoy that magnificent sea of flowers well into October. And believe me, with a few simple tricks, you can enjoy them for even longer.
Pinching is a real secret trick that many people don't know—by simply cutting the top of your plant, you get many more side shoots that are bursting with flowers. Don't just pinch your plants anywhere, but rather in places where you see large gaps in your dahlia flower bed.
And then there's deadheading... Yes, I know, it sometimes feels a bit sad, but your dahlias put their energy to better use by creating new flowers instead of making seeds. Win-win!
With these handy tips, you'll enjoy a beautiful, color-filled garden for months, no matter which dahlias you've chosen!
Harvesting and storing dahlia tubers
As soon as the first frost approaches in the autumn, it's time to take those tubers out of the ground and store them somewhere warm and dry. This way, you can fully enjoy them again next season!
Step 1: Wait for the first frost
A light frost will cause the foliage and stems to turn black and die back. This is the sign that the plant has withdrawn its energy into the tubers. If no frost arrives? Then harvest the dahlia tubers by the end of November at the latest. This prevents damage from prolonged rain, wet soil, and unexpected frost periods.
Step 2: Cut back the stems
Cut all stems back to about 10 to 15 cm above the ground. This leaves you with enough to hold onto while digging and allows you to potentially keep a label attached to the plant.
Step 3: Carefully dig up the tubers
Insert a garden fork or spade about 20 to 30 cm from the plant into the ground. Work around the plant and lift the entire tuber clump up carefully. Never pull on the stems, as this can cause the tubers to break off.
Step 4: Remove excess soil
Gently shake loose soil off the tubers. Check immediately for damage, rotting parts, or slug damage. It is better to remove damaged tubers to prevent problems during storage.
Step 5: Let the tubers dry
Place the tubers in a dry, airy, and frost-free place for a few days. This allows excess moisture to evaporate and reduces the chance of mold growth during the winter.
Step 6: Store the tubers frost-free
Store the dahlia tubers in a crate, box, or bin filled with lightly moist wood shavings, straw, vermiculite, or dry potting soil. Place them in a dark spot with a temperature between 4 and 10 degrees Celsius. A cellar, shed, or frost-free garage is often ideal.
Step 7: Check during the winter
Check the tubers every few weeks. Remove any specimens that become soft or show signs of mold. Do the tubers feel very dry and shriveled? Then you can lightly moisten the storage material.
Step 8: Replant in the spring
From March or April, you can optionally start the tubers indoors. Plant them outside once the risk of night frost has passed, usually from mid-May.
Tip: Label your dahlia tubers before storing them. This way, you'll know exactly which colors and varieties are where next spring.
Common mistakes with planting dahlias
Everyone makes mistakes when gardening sometimes. Here are the most common mistakes when planting dahlias and how to avoid them.
Planting too early:
- Problem: frost kills the tuber or young shoots
- Solution: wait until you are sure that the night frost has passed
- Tips: follow the weather forecast and only plant after mid-May
Incorrect planting depth:
- Too deep: tuber rots away in cold, wet soil
- Too shallow: tuber dries out or gets damaged
- Correct depth: 5-8 centimeters below ground level
Poor drainage:
- Problem: dahlias cannot handle "wet feet"
- Consequence: tuber rots and plant dies
- Solution: improve drainage with sand or raised beds
Too little space:
- Problem: dahlias grow quickly and need space
- Consequence: competition for light, water, and nutrients
- Solution: keep at least 40 centimeters distance between them
Not placing supports:
- Problem: tall dahlias blow over in wind or rain
- Solution: place supports when planting, not later
Thrips and other pests:
- Problem: thrips are a common pest for dahlias and can cause damage to leaves and flowers.
- Solution: check regularly for thrips and other insects such as aphids and spider mites. Consult care advice for effective control.
Safety and toxicity of dahlia plants for animals
It happens more often than you think: you’ve just planted beautiful dahlias and your dog or cat comes over for a curious sniff. What you might not know yet is that dahlias are unfortunately not very friendly to our four-legged friends. Dahlias are toxic to both dogs and cats; the tubers and leaves contain substances that can be harmful if your pet nibbles on them. Do you have dogs or cats running around? Then make sure they cannot reach them, especially if you are storing the tubers inside or have just planted them.
Luckily, dahlias are completely safe for us humans, but wear gloves when planting or moving them – especially if you have sensitive hands, as that saves a lot of hassle afterwards. And don't forget that these beautiful flowers are true warm-weather lovers.
Frequently asked questions about planting dahlias
Can I plant dahlias in April if the weather is nice?
You can plant dahlias in April, but only if you are sure that there will be no more night frost and the soil temperature is stable above 15°C. In many parts of the Netherlands, this is risky. It is safer to wait until mid-May or start your dahlias indoors. Do you want to know more about planting dahlias? You can sign up for our newsletter for free and receive free tips about dahlias.
What do I do if my dahlia tubers haven't come up after 3 weeks?
First check whether the soil is too wet - that is the most common cause. Dig carefully next to the tuber (not on top of it!) to see if there is any development. Sometimes it takes 4-5 weeks before you see anything, especially in cold soil. This means that dahlias can sometimes take a little longer to emerge, especially if the conditions are not ideal. If the tuber feels soft, it has likely rotted away.
Can dahlias be planted in the same soil as last year?
Yes, that is perfectly fine, provided you have improved the soil with compost and there were no diseases last year. Dahlias are not heavy soil depleters. However, it is wise to change the location occasionally to reduce disease pressure.
How many dahlias fit in a square meter of garden?
This depends on the dahlia variety. For small varieties, you can plant 4-6 plants per square meter. Medium varieties: 2-3 plants. For large dahlias, 1 plant per square meter is often enough. Give them room to grow!
Is it necessary to work the soil before I plant dahlias?
Yes, soil preparation helps immensely. Work compost through the soil, improve drainage in heavy soil, and ensure the soil is loose and airy. Dahlias develop much better in well-prepared soil. It takes a little extra time, but your dahlias will bloom much more beautifully.
A few tips for dahlias in bouquets
Choose the right dahlias
Dahlias come in all kinds of shapes, sizes, and colors. For bouquets, the smaller pompon or decorative varieties work especially well. They stay upright better and have a longer vase life.
Harvest at the right time
Cut dahlias early in the morning or late in the evening. Choose flowers that are just opening, because once picked, they do not ripen much further. Flowers that are too ripe will drop their petals more quickly.
Ensure good preparation
Cut the stems at an angle with a sharp knife.
Place the stems immediately in lukewarm water.
Let the flowers hydrate for a few hours in a dark, cool room before arranging them.
This will keep them fresh for longer.
Combine colors and shapes
Dahlias are real eye-catchers. Combine them with airy flowers like cosmos or dill for a playful effect. Or use them as a focal flower in combination with greenery like eucalyptus or ornamental grasses.
Work in layers
Start with the larger flowers in the center and work outwards with smaller or finer elements. This gives the bouquet depth and structure.
Use a color theme
Match the colors of your bouquet to the season or the occasion. Think of soft pastel shades in the spring and warm, deep colors in the autumn.
Pay attention to longevity
Dahlias are beautiful, but they are somewhat more sensitive than other cut flowers. Refresh the water every other day and trim a small piece off the stem each time. Do not place them in the sun or near fruit – that accelerates wilting.
Be creative
Dare to play with shape, height, and unexpected combinations. Use dahlias in a wild field bouquet or in a sleek, stylized arrangement. Nothing is wrong – if you think it’s beautiful, it’s good!
Conclusion
Browsing through our collection of dahlia tubers will make you so happy with all those beautiful dahlias! Dahlias are suitable for both large gardens and small balconies, allowing everyone to enjoy these flowers. And rightly so, because these amazing flowers offer you an incredible variety of colors, shapes, and heights. There is always one that perfectly fits your space, whether you have a large garden or just a cozy little balcony. With a little loving care – a regular drink of water, some nutrition now and then, handy pinching, and keeping those annoying snails away – you can enjoy a true floral display for months on end. Just keep in mind: dahlias are not very tasty for our four-legged friends, so keep them out of reach of your dog. If you know a little bit about which dahlia suits you and how to keep it happy, you will really get the very best out of this versatile beauty. Large or small, every space is cheered up by dahlias – have fun with your own colorful dahlia adventure!